How to automate Fotoba trimmers?
If you need to produce a lot of custom jobs with different sizes on a roll printer and lose time to manually cut each one, you can now use the ASP (Automated Slicer Positioning) functionality of the Fotoba XLD 170 (available only with CalderaCare).
A specific barcode is printed with the trimmer's marks by Caldera RIP to automatically adjust the position of its vertical blades (X/Y blades image tracking). It will give you unattended flexibility to cut various flexible digital media with maximum precision and speed.
Trim-O-Matik option is required.
Activate the ASP algorithm
- Open the module, go to the Marks tab and enable trimmers.
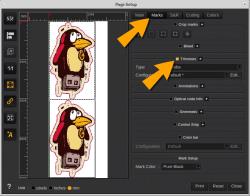
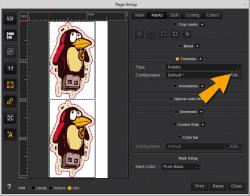
- In the Trimmers area, click Edit…
- In the Print tab, go to the layout algorithm and select ASP.
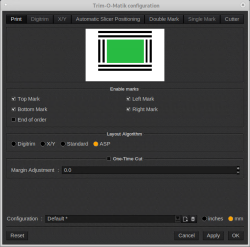
- Finally, click Apply.
Set the ASP algorithm
- Go to the Automatic Slicer Positioning tab to this algorithm.
- Set the parameters as wanted according to the following information:
- Choose between Roll to Roll configuration or Inline configuration.
- Check the Sensor both sides if you want to add the barcode on both sides of your job.
- Indicate the Sensor Line Width.
- Type a Width and a Height for the indicator.
- Specify the Space between image.
- Indicate the Width of the vertical mark between images.
- Type a max number of elements per row.
- Check Barcode if you want to add a barcode. Uncheck this option, if you want to use the legacy mode without barcode.
- Barcode base URL.
- Force on every row.

- Click Apply.