Caution
Starting with CalderaRIP V16.3 and CalderaDock V3.0, the CostView web module interface was deprecated. Also with these versions, the CostEstimation option (CostView + CostProof) was retired.
CostProof alone was kept on CalderaRIP's Spooler and, in the near future, other new tools for cost and ink consumption management will be available.
The present document is a Quick Start to get you started with CostView. For further information please refer to our CostView User Manual.
License
CostView was multi-RIP but you needed to have only one license on your license-server to use it. You also needed to choose the main RIP where CostView was activated, containing the databases.
Start
Prior to V16.3, CostView was automatically installed with the CalderaRIP station. To access it, you needed to open a web browser and enter “localhost” or the main RIP station IP address.
The following page, CalderaWeb Server, opens:
Here, you will find CostView under Caldera Services. Click on it to open CostView.
The first time you open CostView, the configuration main page will open. Please fill in all fields.
Click on Save. A pop-up will show and ask you to enter a new password. Enter it twice; this is your new CostView password. Don’t forget, you’ll need it to change the configuration settings and for other actions (like deleting jobs).
CostView is now ready to be filled up and used.
To access CostView quicker, you can bookmark its address in your web browser.
Add a RIP
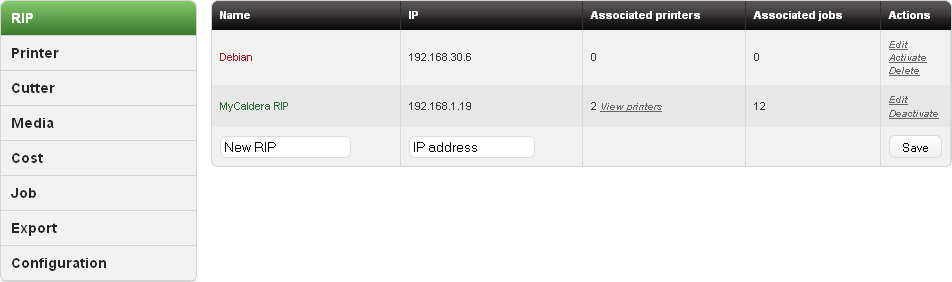
The first thing you may do, after CostView global configuration, is to add a Caldera RIP (or several). Go to Admin then RIP.
To add a new RIP: enter its name, and its IP address (if you enter an invalid one, a warning pop-up will show) and then click on Save.
Add Printers
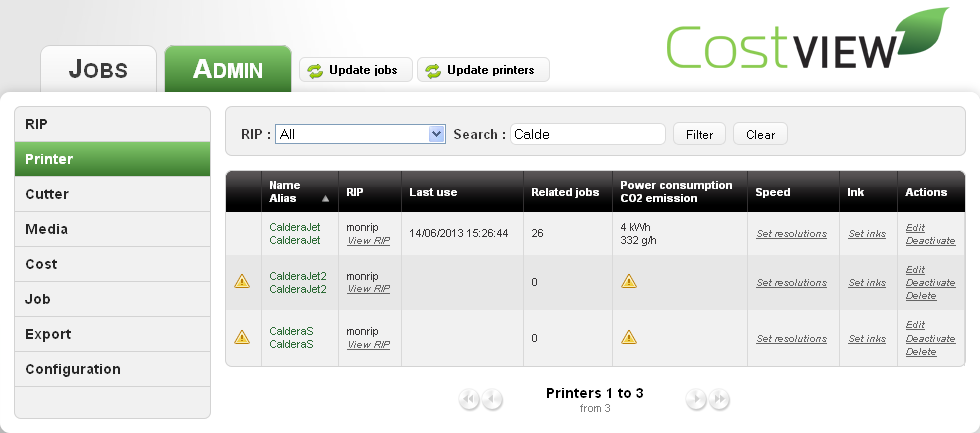
You then need to add printers related to your RIP. Go on Admin then Printers.
Click . A pop-up opens and shows you a list of printers that can be added:
Choose in the list the printer you want to add or all by checking Check all. You’ll see a pop-up that informs you that the system is updating:
When the update is ended, a new pop-up informs you how many printers have been added.
When all your printers have been added, fill up their fields, especially those that are relative to costs if you want to have a cost calculation when you add jobs.
Add Cutters
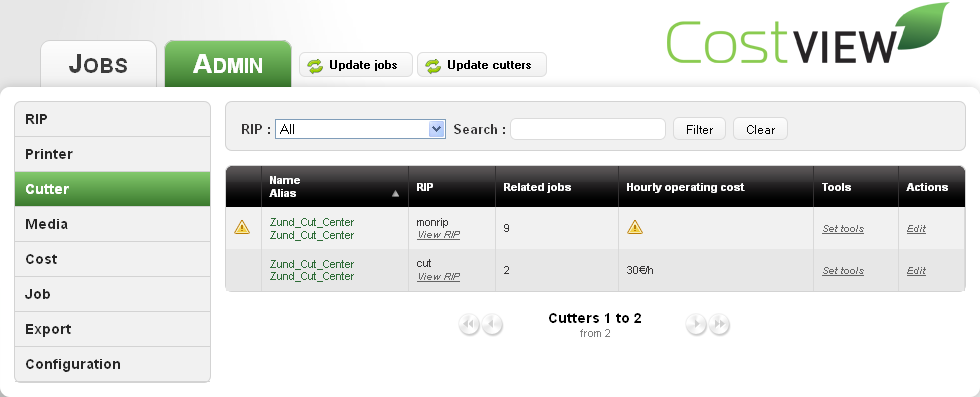
You then need to add cutters related to your Caldera RIP. Go on Admin then Cutters.
Just so you know, only Zund Cut Center cutters are supported by CostView.
Click . This button is available only on the cutter’s administration page.
You’ll see a pop-up that informs you that the system is updating: Then, another pop-up opens and shows you a list of cutters that can be added:
Choose in the list the cutter(s) you want to add or all by checking Check all.
When the update is ended, a new pop-up informs you how many cutters have been added.
When all your cutters have been added, fill up their fields, especially those that are relative to costs if you want to have a cost calculation when you add jobs.
Add Media
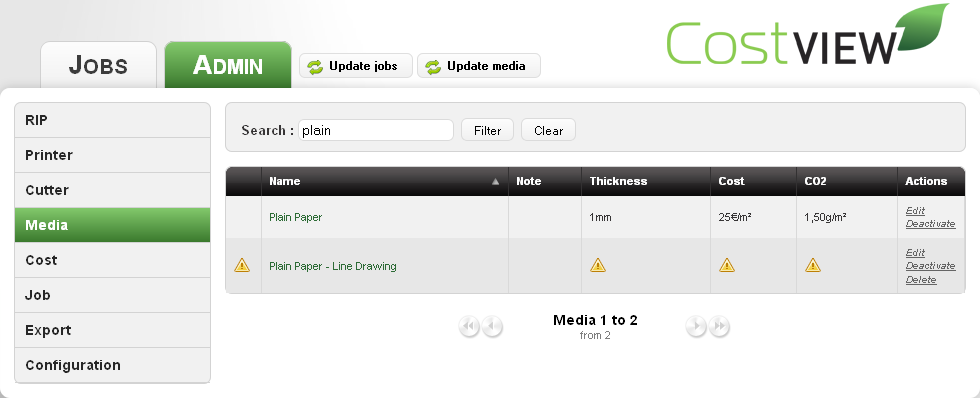
Then add your media: go on Admin then Media.
Click .
You’ll see a pop-up that informs you that the system is updating: Then, another pop-up opens and shows you a list of media that can be added:
Choose in the list the media you want to add or all by checking Check all.
When the update is ended, a new pop-up informs you how many media have been added.
When all your media have been added, fill up their fields, especially those that are relative to costs if you want to have a cost calculation when you add jobs.
Extra Costs
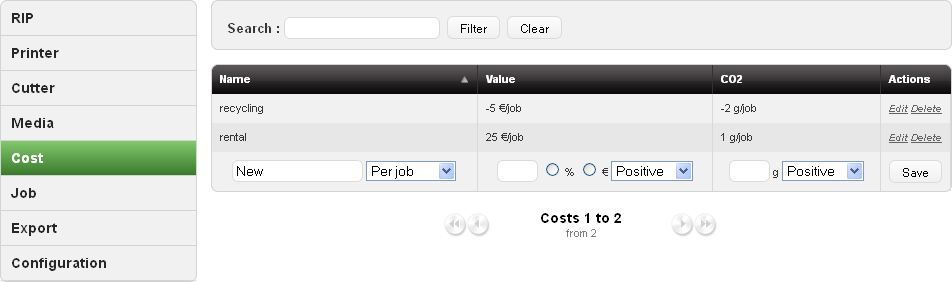
With CostView you have the possibility to create extra costs to later be associated with jobs. These costs are associated with the job during their import in CostView. You cannot add an extra cost once a job has been created so make sure that all of them have been properly entered before importing new jobs.
Add Jobs
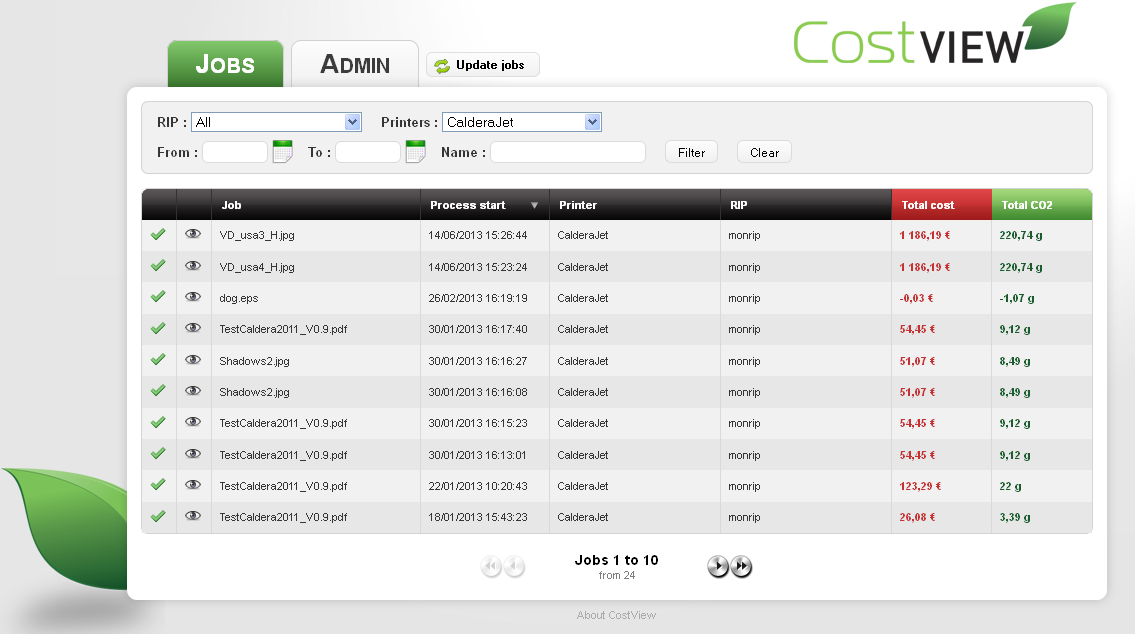
At last, add jobs to the jobs list. Click on Update Jobs. This button is available at any time and from any part of CostView.
A timer informs you that the system is checking about new jobs.
Then, if some fields aren’t filled like ink costs, and if you have chosen to be notified in this case (configuration part, activated by default), you will see an advertisement pop-up:
If you click on Yes, the jobs will be updated, if you click on No, you’ll return to the precedent page without any add.
When the update is ended, a new pop-up informs you how many jobs have been added.
You can then see new jobs in the jobs list.