In Caldera VisualCut, you are able to link a named cut contour to a specific Graphtec Tool setting (also known as Condition).
In this example we create Condition 2 for a kiss cut and Condition 3 for a thru cut (using a perforated line). We also use the cutter settings for Speed, Force, Acceleration and Cut Line type.
On the cutter (please refer to your Graphtec FC9000 manual for exact instructions on accessing the cutter menu's).
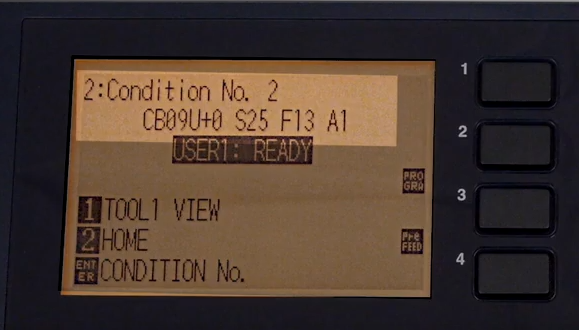
Condition No. 2 (set for kiss cut and tool slot #1)
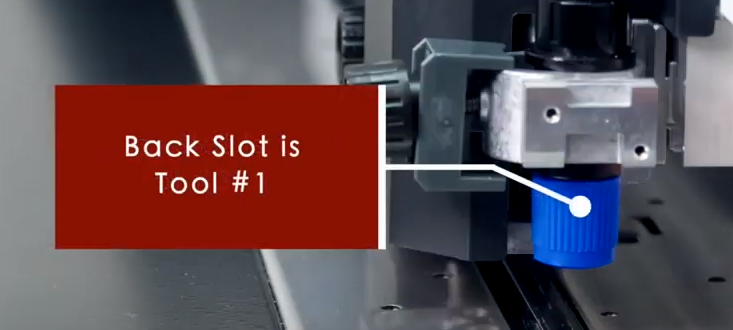
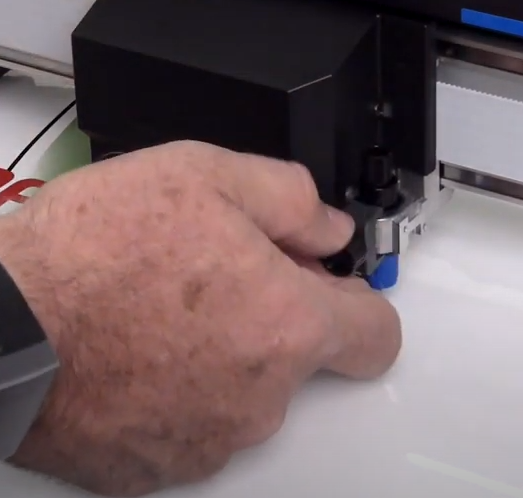
The tool slot position to the back is the one used for kiss cutting (cut blade being backed up by solid platen surface)
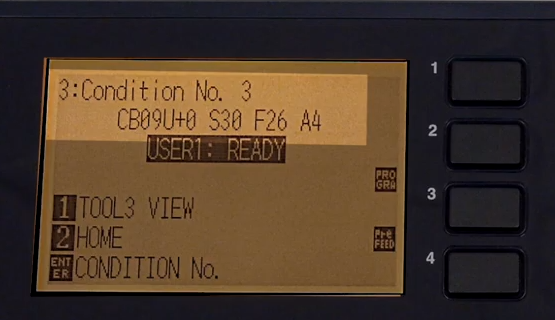
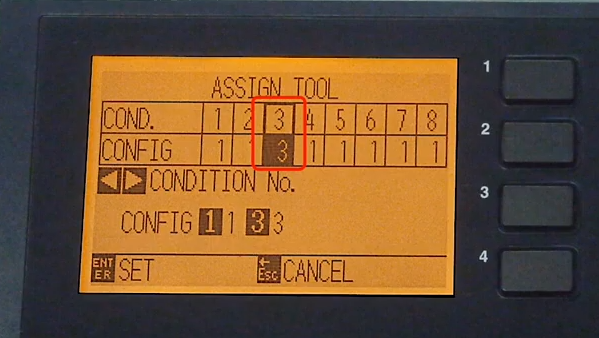
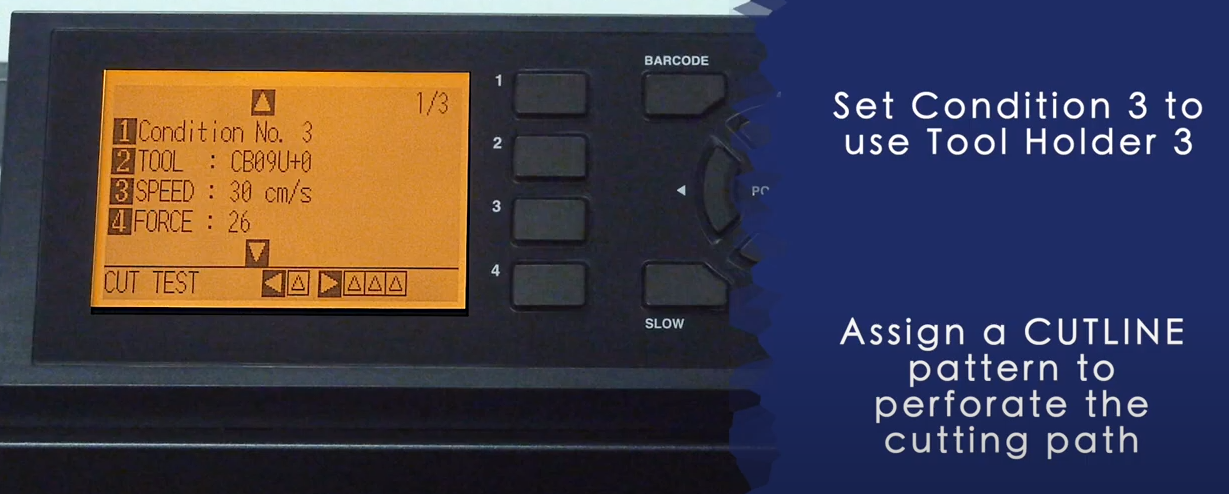
Condition No.3 (set for thru cut using a perforated line and using tool position Tool #3)
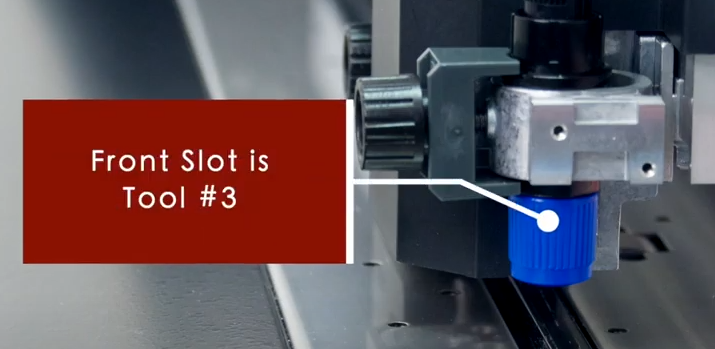
The knife is to be set in the front slot when performing a thru cut or perforated cut (cut blade inline with the opening in the cutters platen)
Assign Tool #3 to Condition 3
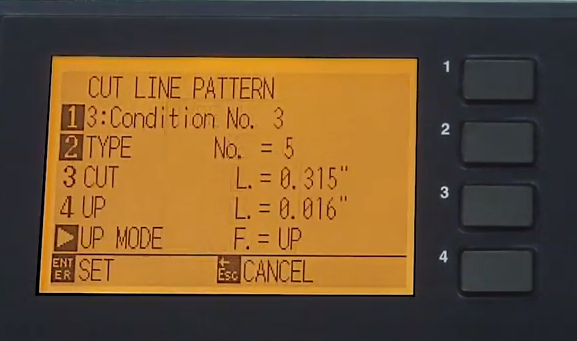
To create a perforated cut modify the Cut Line. Graphtec recommends using number 5 (preset for Cut 0.315" or 8 mm and Up 0.016" or 0.4 mm)
In the Cut Line Pattern menu, select Type number 5
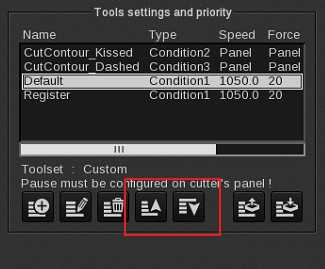
In Caldera, open VisualCut and Configure the kiss cut to use Condition #2 and the perforated cut to use Condition #3. See below on configuration details:
Using the Caldera Test file (it has two named cut contours inside the file, CutContour_Kissed and CutContour_Dashed).
The spot color named CutContour_Kissed is to be linked with a tool with the same name (Caldera uses the contour name to link to the cut contour present in the job with the contour name in the Tool settings and priority list) and set to Tool type: Condition2.
Deselect the Speed, Force and Acceleration when you like to use the cutter based settings. Under Line Type you can select Solid Line or User Defined. When selecting User Defined the Cut Line settings defined on the cutter panel are being used.
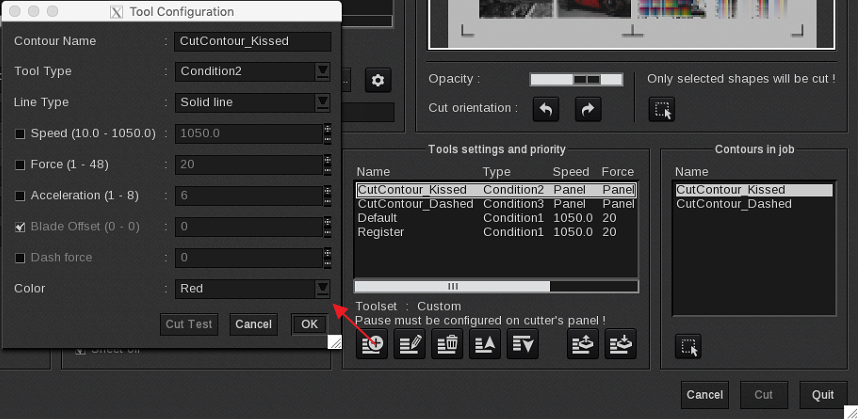
The spot color named CutContour_Dashed is to be linked with a tool with the same name and set to Tool type: Condition3
Under Line Type you can select Cut 8mm / Up 0.40mm (Cut 0.315" / Up 0.016") or User Defined. When selecting User Defined the Cut Line settings defined on the cutter panel are being used.

In VisualCut make sure that the kiss cut (CutContour_Kissed) is the first in the priority list, as the kiss cutting should start first (use the arrows to change the priority).
Now submit a job for cutting. After the kiss cutting is finished the cutter will pause and ask that the knife will be moved to the front slot (Thru cut).
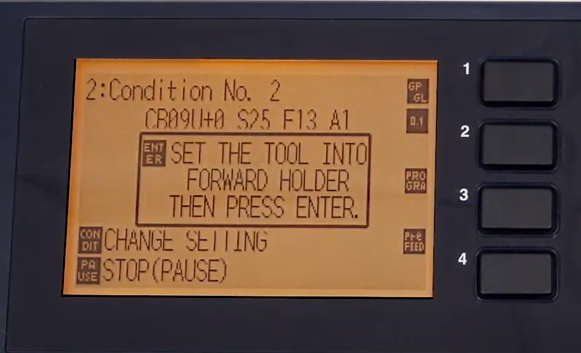
So move the Tool and press enter once the tool is in the forward position.
Source materials (Caldera).
How to create a Cutcontour in Adobe Illustrator
Graphtec FC9000 video (for the Graphtec specific settings, ignore the Illustrator settings as that doesn't apply to Caldera).
https://www.youtube.com/watch?v=Lx0emrkcOLY