Issue:
You added a new internal hard drive to the computer but your Linux operating system does not provide access to it.
Warning: this article is not about an USB connected drive that is plugged to the computer, we are talking here about a hard drive inside the desktop computer. In case you use this method with an USB connected drive then it will try to mount this drive systematically when the computer is booted and you can have a problem to boot the system if the USB drive is not plugged during the boot.
In this article we will see the various steps to add a new hard drive to a Linux operating system by using mainly the terminal.
Please be aware that there will be no indication here about how to add the hard drive physically inside the computer, this process has to be used after you have already done that, started the computer and reached the operating system.
You will need to have administrator privileges (root) on the computer in order to be able to do the process in this article.
1) Is your hard drive formatted?
To be able to mount a hard drive, it needs to have an existing partition and be formatted.
In the case your hard drive has already data on it then it means it already has a partition and a file system so you can directly go to step 2.
If your hard drive was never used before you will have to format it first.
This article does not explain how to format your drive as it's not its purpose, you should go to step 2 only after having done the formatting.
Formatting can be done in command line or by using the Gparted application, the second being easier as there is a visual interface to use.
It's advised to have an ext4 partition on a disk intended to be used on a Linux system.
2) Add the drive to the operating system
a) Create the folder to access the drive.
First you need to decide by which folder you wish to access this drive as you will have to create this folder.
For our example we are going to access this drive by going to the folder /DISK2, the / being the root of the hard disk where the operating system is installed and the folder DISK2 will be representing the new drive.
To create this folder we will use the command "mkdir" in terminal.
The syntax is "mkdir name-of-the-folder-to-create".
The command needs to be launched with root access rights so we will put "sudo" before the command. So for our example we will put the following in the terminal:

Validate the command ENTER and put the root password if requested.
b) Identify the partition to add.
To obtain the exact name of the partition you can use the command "lsblk".
You have to look for the partition that has the size of the hard drive you are trying to add (usually a little less) and that does not yet have a mount point.
Please find bellow the command to use and information about how to read the output:
In this example the partition we need to mount is sdb1.
Remember the name of the partition that represents your new drive, you will have to use it in the next steps.
c) Identify the UUID of the partition.
This manipulation permits you to identify the partition by its UUID number as this number will be necessary in the next step.
To obtain the UUID number of the partition to mount you have to type the following in the terminal:

Validate with root password if asked.
Copy the content of the UUID field of the partition you need to mount, so the one of the partition name you identified previously (sdb1 in our example).
The TYPE field is the type of system in which the drive is formatted, may be useful to also retain this information.
d) Add the partition to the boot of the computer.
The "/etc/fstab" file is a file that is loaded at the start of the operating system.
It contains the hard drives that are mounted with the operating system so we need to add the new drive there.
Edit the /etc/fstab file by typing the following command in the terminal:
- On Debian:
sudo pluma /etc/fstab

Validate the command with the root password.
This command will launch the Pluma text editor to edit the file.
- On Ubuntu:
sudo gedit /etc/fstab
Validate the command with the root password.
This command will launch the Gedit text editor to edit the file.
You will see that you have already in this file the default hard drive mounted: we will use the same syntax to add the new drive by adding a new line for it.
Syntax:
When you are going to add the new line:
- Be sure to not have the " signs around the UUID number (as in the previous "blkid" command the signs were around it).
- The "ext4" in the line is the type of file system used on this hard drive (it's the field Type in "blkid" command).
- For the options use "errors=remount-ro".
- The end is always 0 1
Please see the example bellow (step e) if you need to better understand what to type exactly.
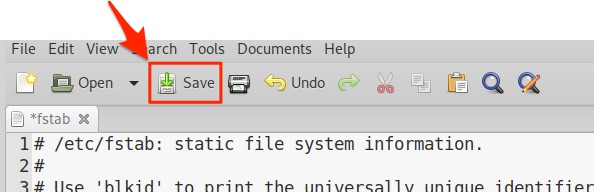
Then save the file and close the editor.
- On Debian:
- On Ubuntu:
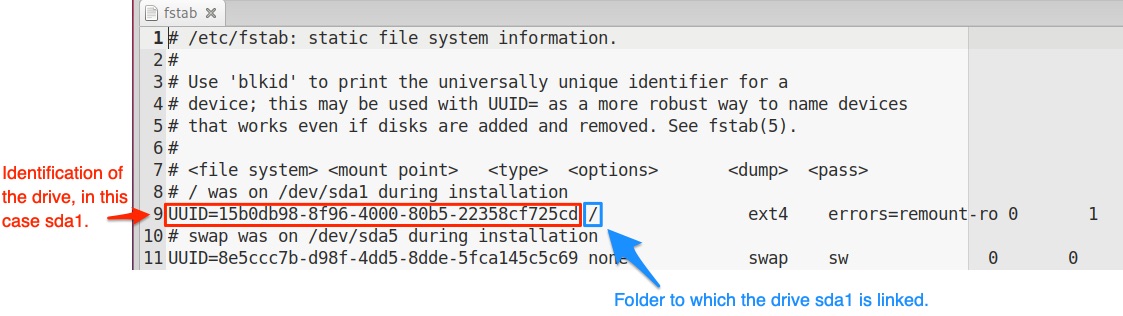
e) Example of line to be added to /etc/fstab.
An example of the line to put for a drive added to the folder /DISK2, folder we created before:
Adapt the UUID, the folder and the type to your need, keep the end of the line as indicated in the example (errors=remount-ro 0 1).
f) Reboot.
Reboot the computer to apply the changes.
After the reboot you will be able to access your new drive by going to the folder you created for it (in our case it's /DISK2).