Nest-O-Matik is a feature designed to nest multiple files together for printing as a single job, thereby minimizing media consumption.
This feature allows for automated nesting to enhance efficiency and reduce material usage. By using the "Nest" action, you can drag and drop the files you wish to print, and CalderaRIP will generate an Autonest job that consolidates your selected files.
Additionally, you can configure nesting parameters specific to each printer and set conditions for automatically triggering the printing process.
Quick use of Nest-O-Matik
(Via the Print Module and Spooler)
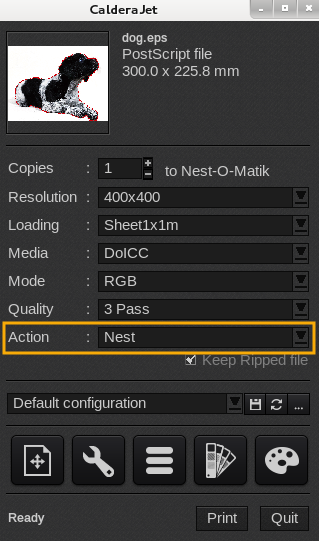
- To nest files using Nest-O-Matik, drag your file to the Print module and select "Nest" as the Action:
- Set your print parameters and click the Print button when you are ready. Repeat steps 1 and 2 with the additional files you wish to nest.
Info
The printer settings must remain the same; otherwise, more than one nested file will appear in the Spooler.
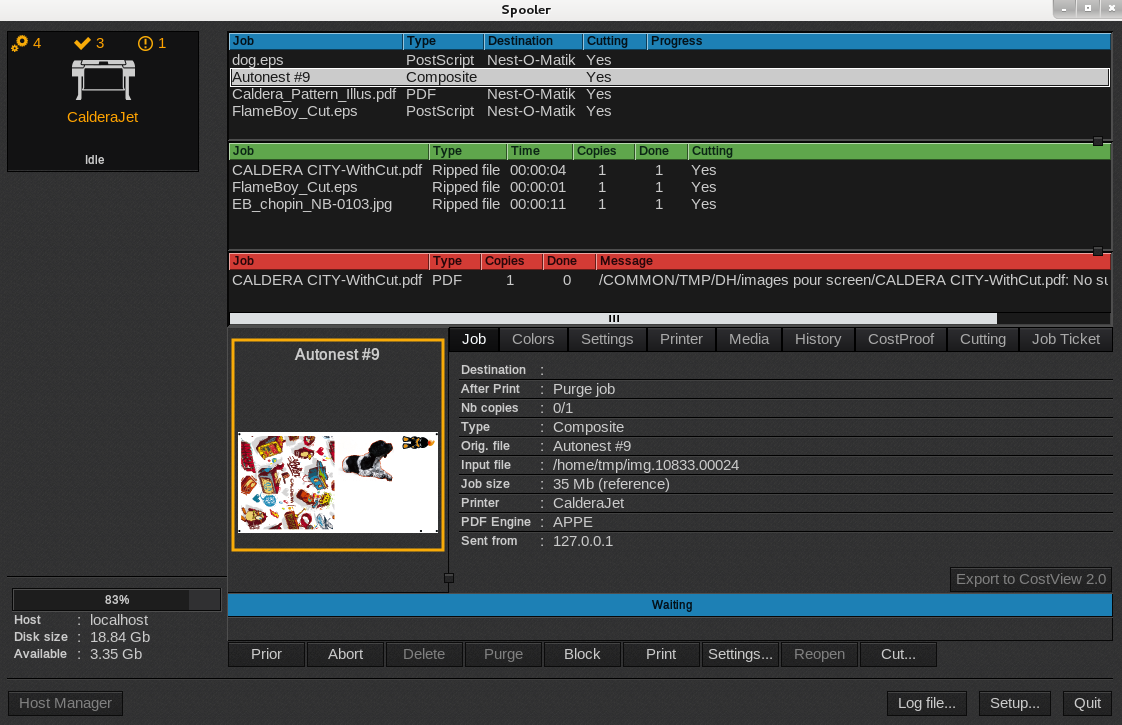
- Launch the Spooler to view your nested job. The name of the nested job is "Autonest", and it appears in the "Running jobs" queue. You can click on the job to view a thumbnail of the nested files.
- To print the job, select the Autonest job in the queue, and click the Print button located at the bottom of the Spooler window:
You might be interested in reading: When to use Trim-O-Matik with Nest-o-Matik or Step&Repeat?
Configuration of Nest-O-Matik
(Via the ServerAdmin)
See the instructions below on how to create a workflow to automatically launch the print action for nested jobs. The job will be printed automatically once the parameters you set are met.
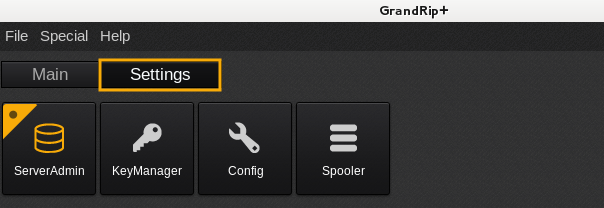
- In the Application bar, open the Settings tab, then double-click on ServerAdmin:
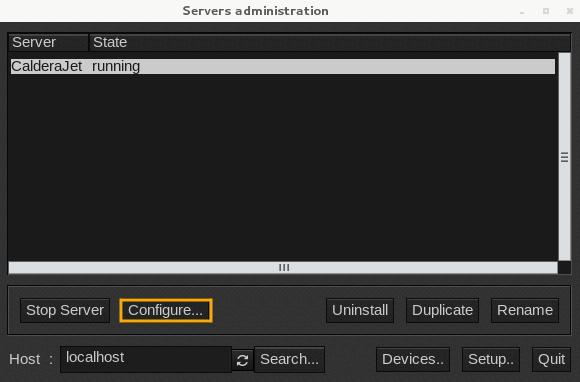
- In the list of print servers, select the one for which you want to create a workflow.
- Click the Configure... button:
- Another pop-up will appear. Go to the Nest-O-Matik tab:
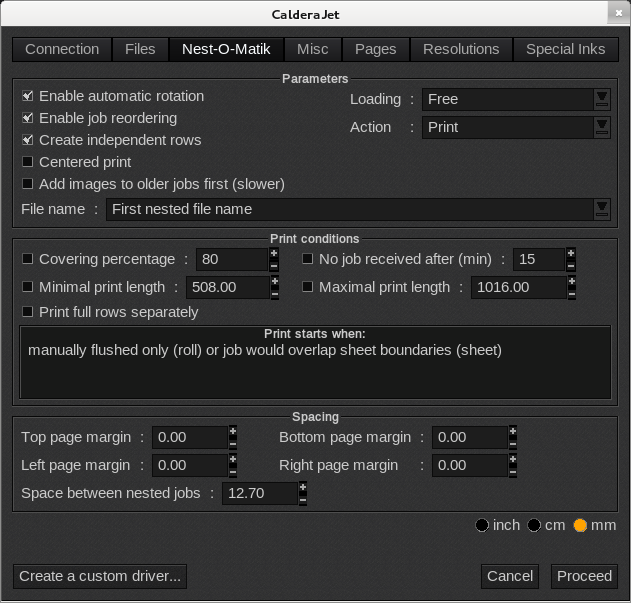
- In the Parameters section, you can define:
- Various "Image parameters", such as automatic rotation, reordering, independent rows, centered printing, file name, and the action to perform.
- And the "Loading parameters", which allows you to select a specific loading format ("Roll" or "Sheet"), as well as "Free" or "Strict" loading.
Info
The "Loading parameters" enable you to specify the loading size directly from the Print module, rather than setting it in the ServerAdmin.
The "Free" option sets the loading size based on the first nest job created and retains that size for all subsequent jobs until a different Autonest job is generated.
In contrast, "Strict" treats the loading size as a constraint, separating images into different Autonest jobs according to their respective loading sizes.
- Under the Print conditions section, you can define your parameters for when to automatically start the print action for nested files. When enabled, the nested job will begin to print when:
- Covering percentage: At least X% of paper width (if roll) or sheet surface (if sheet) is used.
- No job received after X minutes: No new print jobs arrive after X minutes.
- Minimal print length: Printed output length is at least X inches, cm, or mm.
- Maximal print length: Printed output length exceeds X inches, cm, or mm.
- Print full rows separately: A full row has been formed.
- You can also assign Spacing in the related section.
- Once you have defined all your parameters, click on Proceed to save your changes.