Fujifilm Acuity LED 1600 series- Printer Settings
Printer
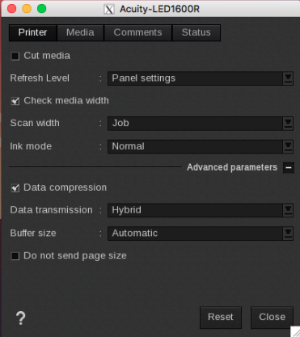
- Cut media: you can enable the embedded cutter.
- Refresh level: frequency of head quick cleanings during print. You can choose among: Panel settings, Low, Normal, High and Very High.
- Check media width: a warning is shown if the media width is smaller than the printed document.
- Scan width: allows to limit the movement of the head to either the printer’s full width or only the job’s width. You can choose between Printer (the head scans all the printer’s width) or Job (limits the head scan over the job’s width only).
- Ink mode: you can choose among: Normal for a matte aspect, Glossy or Irradiation only if you only want UV lamps (not ink will be printed).
Advanced parameters
- Data compression: do not change these parameter if you do not face USB communication issues.
- Data transmission: do not change these parameter if you do not face USB communication issues.
- Buffer size: do not change these parameter if you do not face USB communication issues.
- Do not send page size: enable this option to avoid the rewind of the media at the end of the print. I will waste some media but is useful for some medias as textiles.
Media
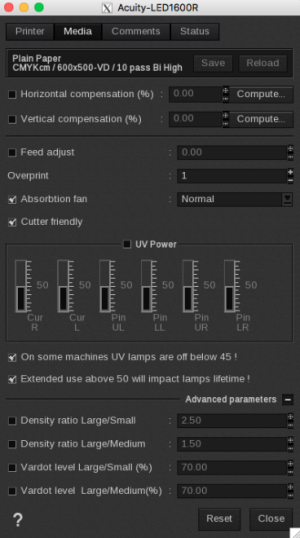
- Information: at the top of the window, you are able to see information about your media. There you have access to two actions:
- Save: when you click on this button, the current media settings are saved to the selected media profile (printer, media, resolution, mode) so there will be applied for any new job using the same print configuration. If you don't save, the changes you made are only applied to the current job.
- Reload: will revert back to default as set during profiling or the last saved changes.
- Horizontal compensation (%): we recommend not to modify this. Any deviation is likely to be mechanical on the printer's side.
- Vertical compensation (%): this can be useful if you detect an increase or decrease in the length due to heating or media tension which is common when printing on vinyl or textiles for example. To calculate the compensation, click Compute and follow the software’s instructions.
- Feed adjust: you can enable or disable this function by checking or unchecking the box. Type the number (between -255 and 255) wanted or use the + and - buttons.
- Overprint: multiply the amount of ink by the selected factor. Type the number wanted (between 1 and 9) or use the + and - buttons.
- Absorption fan: here, you can select one of the following option to set the absorption strength: Off, Low, Normal, Weakor Weakest.
- Cutter friendly: indicates if the media supports cutting or not.
- UV Power:
- On some machines UV lamps are off below 45!: no change is made, it is just a warning for the user.
- Extended use above 50 will impact lams lifetime: no change is made, it is just a warning for the user.
- Density ratio Large/Small: change the ration between small, medium and large droplets in variable drop. Choose a number between 1 and 20.
- Density ratio Large/Medium: change the ration between small, medium and large droplets in variable drop. Choose a number between 1 and 20.
- Vardot level Large/Small (%): change the ration between small, medium and large droplets in variable drop. Choose a number between 0 and 100.
- Vardot level Large/Medium (%): change the ration between small, medium and large droplets in variable drop. Choose a number between 0 and 100.
Comments
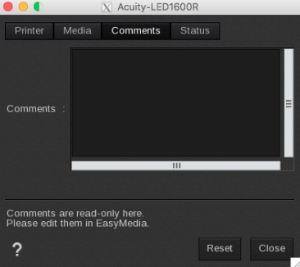
In this tab you can see comments coming from the EasyMedia* module. It can include comments from the global media window and from the profile project window.
Status
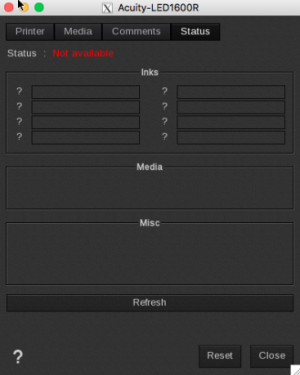
- Inks: information about Inks levels
- Media: information about the media loaded on the printer
- Misc: complementary info about the printer (model, serial number, firmware version)
- Refresh: button to refresh the tab.