The following settings are available in CalderaRIP from version 11 onwards.
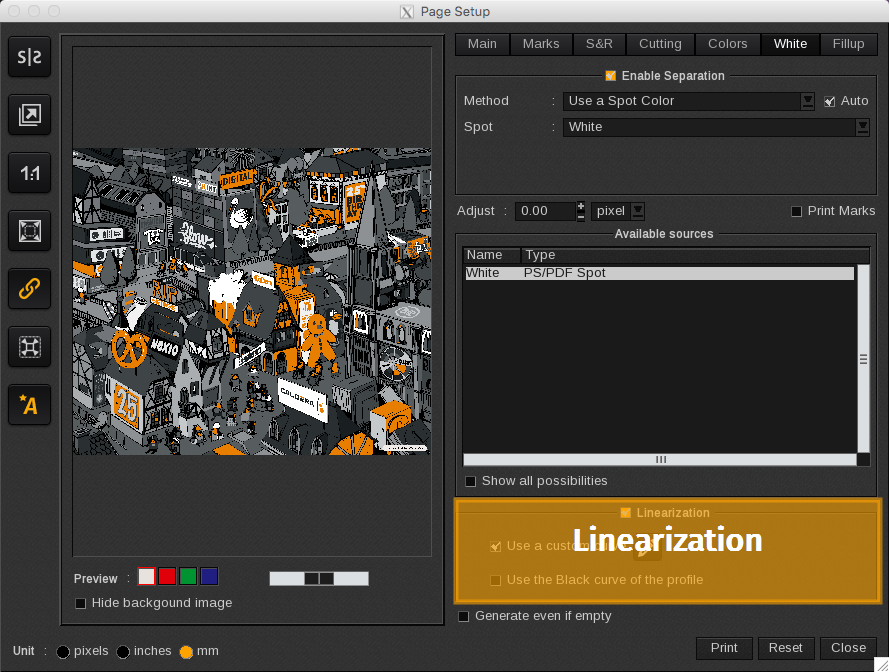
In this area, you can linearize and set a maximum limit for Special Inks (white, fluorescent, varnish, gloss, silver, metallic, etc.).
By default, the software uses the best possible curve, but you can implement changes by activating the corresponding section:

Use a custom curve
This setting enables you to create or load a specific curve when the default option does not meet your requirements. This flexibility allows for precise adjustments to achieve the desired output quality.
Click on the Edit icon ( ) to display the Curves window:
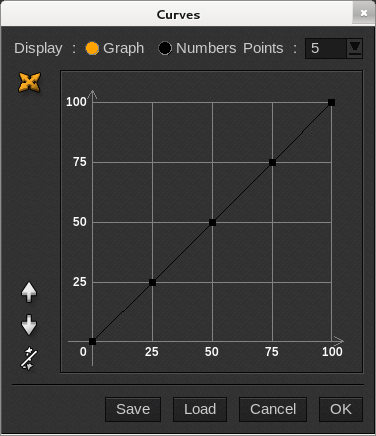
Here, you can:
- Display: Choose to view the data either in a Graph format or as Numerical values.
-
Ctrl Points: Select the number of control points used to create the curve, with options for 5, 10, 20, or 100 points. You can also select "Free".
Info
If you are using the chart format, the free control points will show you two additional (white) icons to add or remove control points:

-
Adjust curve (lower arrow icons): Modify the curve's shape by raising, lowering, or straightening it to achieve the desired output:

-
Save / Load: These buttons enable you to save or load a curve correction file in PPC format.
When clicked, the File Selection window opens, allowing you to navigate to the desired location for saving or loading the file: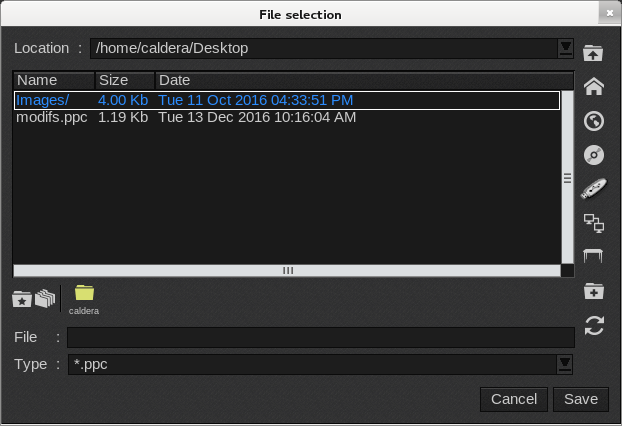
When loading a file, you typically need the appropriate linearization file (.ppc) for the device you are using. To do so, navigate to the ICC Profiles directory (/opt/caldera/lib/ICC_PROFILES/) as shown below:
- Cancel: Closes the window without saving any changes.
- OK: Saves the changes and closes the window.
Use a custom curve (alternative method)
If you do not have a linearization file to load, you can print this target using 100% white.
Once you have done it, observe the areas where there is excessive white and where the rendering begins to deteriorate.
Based on your observations, adjust the white linearization accordingly. Select the maximum value and create a straight curve to optimize the output. For example, you might set the range from 0% to 85%.
Use the Black curve of the profile
This setting adjusts the current profile's black ink linearization curve. It links the linearization of black ink to the behavior of any special ink, such as white, metallic, or varnish, ensuring that the performance of these inks is automatically adjusted based on the selected print mode.
Good to know
In the case of white, its limitation is often linked to the other inks' maximum (due to resolution and media chosen).