After loading the EFI Fabrivu driver in Caldera it still requires some configuration (This FAQ also applies to the dual CMYK Reggiani models):
1) Add the printer specific resolutions and passes:
The list of printing modes (resolutions) for the EFI FabriVu driver must be imported from a collection of printer setup files (In the printer controller > Tools > Export Print Parameters)
On the Windows based printer controller, locate the folder:
"print_parameters" ([Drive]:\Reggiani\print_parameters), create a ZIP archive of the contents of this folder.
Copy it to the Caldera rip. Next step is to import the print parameters:
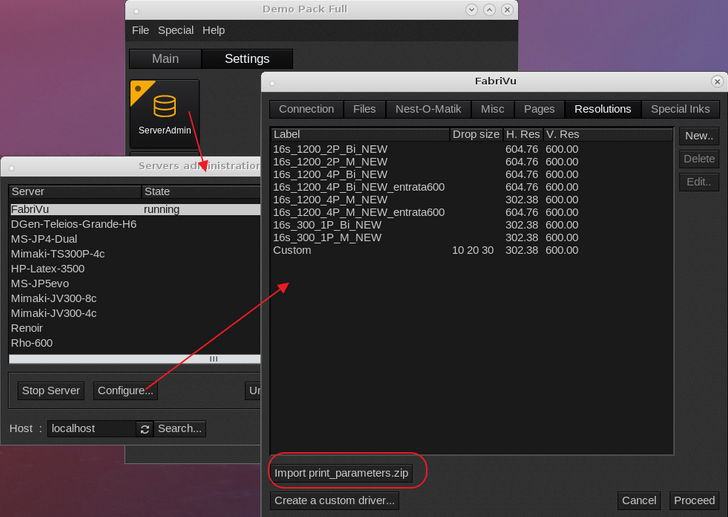
Settings Tab > Servers Admin > select the printer > Configure button > Resolutions tab > click the "import print_parameters.zip" button.
If any errors are encountered during the print_parameter.zip import, check the following article on creating a complete print_parameters.zip
How to create the print_parameters.zip file
A file browser will open, allowing you to select the zipped archive > press the Proceed button (password caldera) and the resolutions should appear in the printer driver.
Another option is to access the print_parameter through the network. Reggiani printers share the Reggiani folder and this folder has two subfolders:
a) jobs_to_prepare (output folder for the print/ripped files. This folder needs to be mounted as the printer driver will use this to rip the files to.
Settings Tab > Server Admin > Select the FabriVu/Reggiani > Configure > Files Tab > Base directory field.
b) print_parameters and this folder contains the printer parameter (resolutions), print_parameters_list.txt and the configuration.ini. This is the same folder which contents is to be compressed into the print_parameters.zip file.
2) Create a new 2xCMYK mode using the EasyMedia ink set editor:
Open EasyMedia, select the printer icon <Next> select the Fabrivu <Next> select an existing or create a new media <Next> in the mode/resolution section, select the "Edit inksets" (Custom Ink Set editor).

Create a new print mode per following screenshot:
Enable the "Merge Dual inks into one linearization channel" and select under Dual Screening type "Even Distribution".
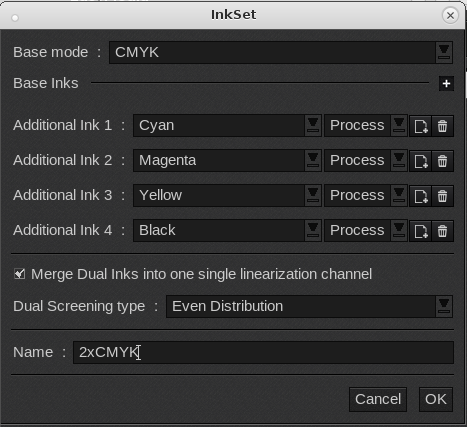
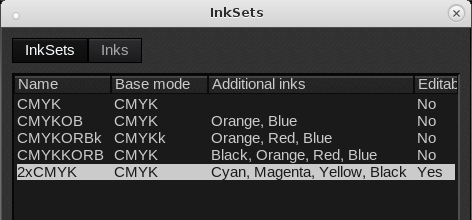
One should end up with following print mode:
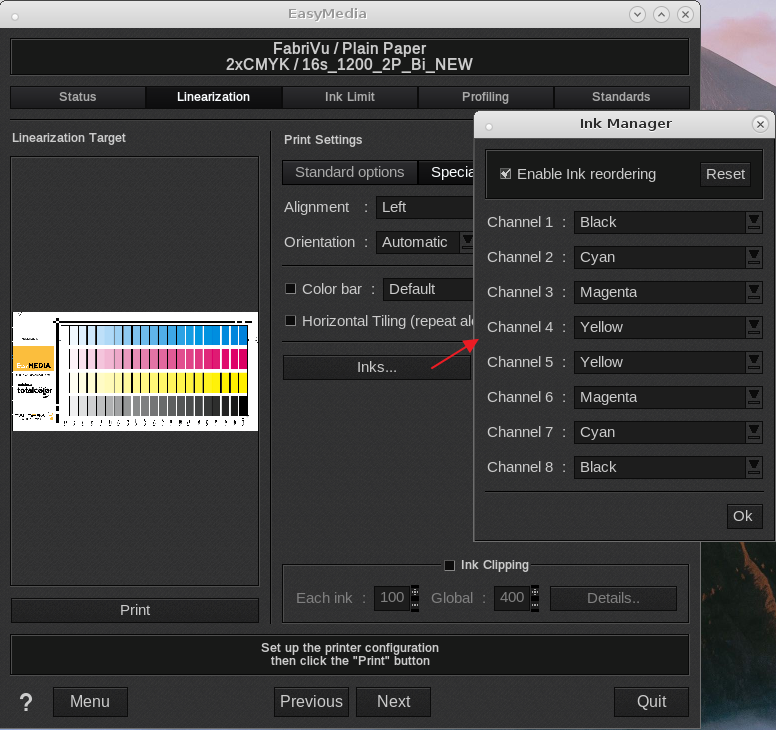
3) The last step is to set the correct ink order. Assuming KCMYYMCK as actual printer ink order.
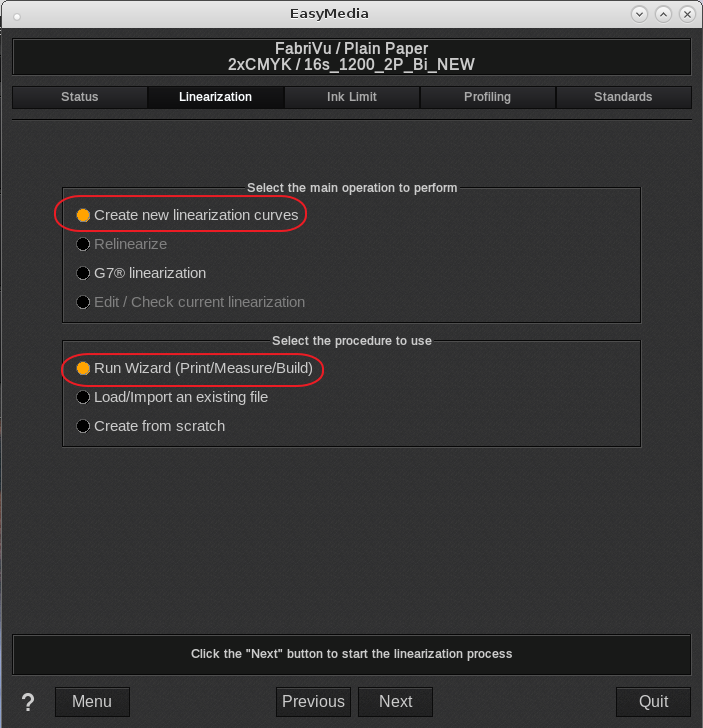
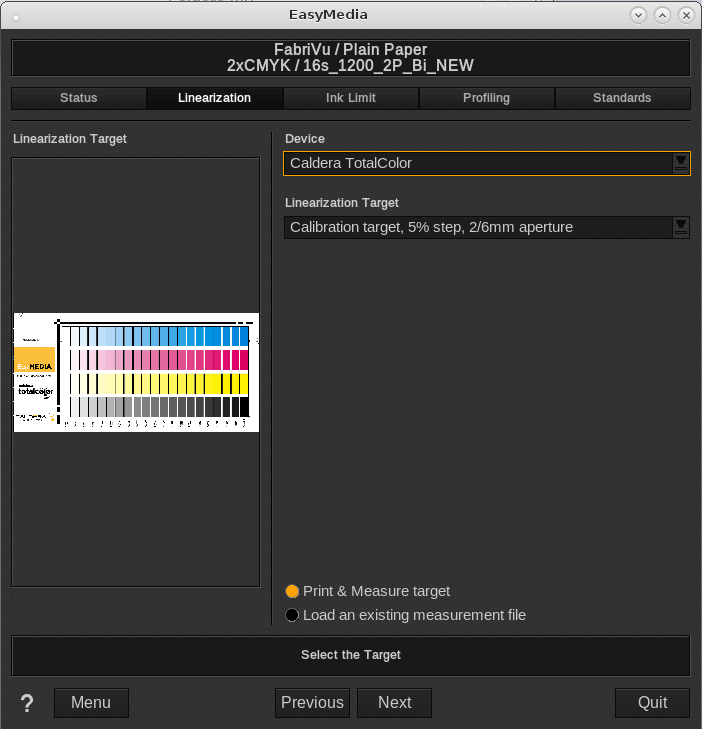
Proceed to the Linearization section in EasyMedia.
In the linearization section select:
"Create new linearization curves" and "Run Wizard (Print/Measure/Build)"
<Next>
Select the Spectrophotometer and the appropriate linearization target.
In this example we select the Caldera TotalColor and a target with a larger aperture <Next>
In the target print dialog set the custom ink order under the Special options tab.
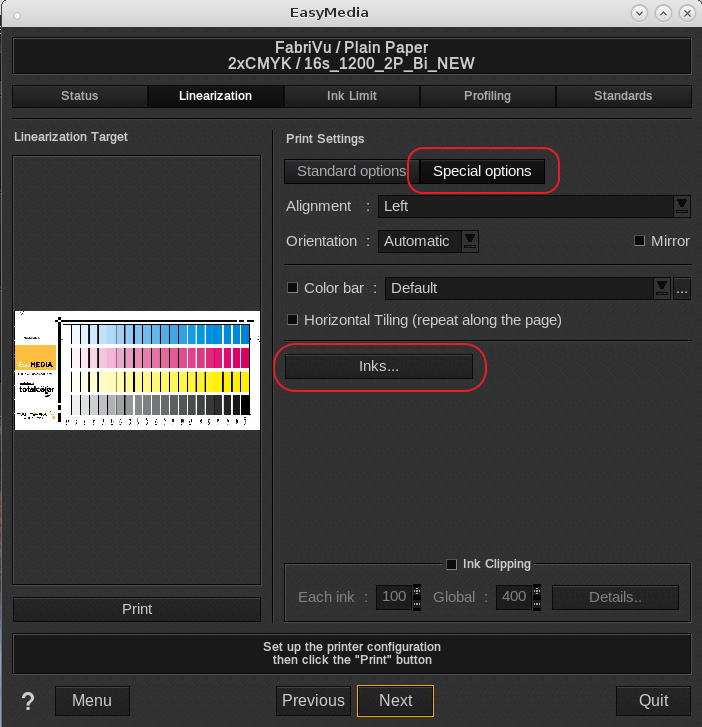
Assuming KCMYYMCK ink order then set it as follows:
Channel 1: Black
Channel 2: Cyan
Channel 3: Magenta
Channel 4: Yellow
Channel 5: Yellow
Channel 6: Magenta
Channel 7: Cyan
Channel 8: Black
Now continue to print the target. The resulting ripped files consist out of eight 1 bit TIFF files which can be loaded on the printer controller:

After printing and measuring the target continue the normal ICC profiling process per wizard.
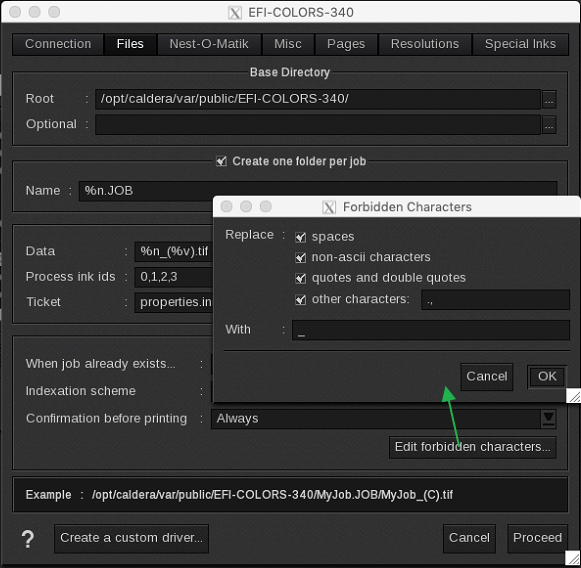
4) Be aware that the EFI controller might refuse loading ripped files with unsupported characters.
For example a file name like Test_Print_48.5x96.pdf will not load due to the dot in 48.5 so configure the printer driver to replace these "forbidden" characters with an underscore:
Settings Tab > Server Admin > select the Fabrivu/Renoir > Configure > files tab.
Enable the forbidden characters and add the problematic characters.
_____________________________________________________________
Background information on the new screening method (introduced with version 13).
The "Enhanced" 2xCMYK mode has the following properties:
- Exact distribution of ink for the 2 print heads firing the same ink.
- The new screening method of Even Distribution has a higher smoothness.
- Only 4 inks to linearize.