As you may have already seen in this article, it is possible to customize the margins, the position of the marks, the cutter boundaries, and other functions in the "Marks and Margins" tab.
Info
Please note that your GrandCut machine may have specific functions not described in this article. For further information, you can consult the technote dedicated to your device in this section, or consult the manufacturer directly.
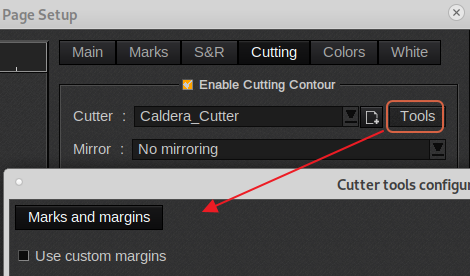
In the following application case, the Zund Cut Center driver is being used.
The majority of cut drivers only have the Tools "Marks and Margins" tab under the Printer drivers, Page Setup > Cutting Tab, Tools button
Sizes can be set in either set in mm or inches.
________________________________________________
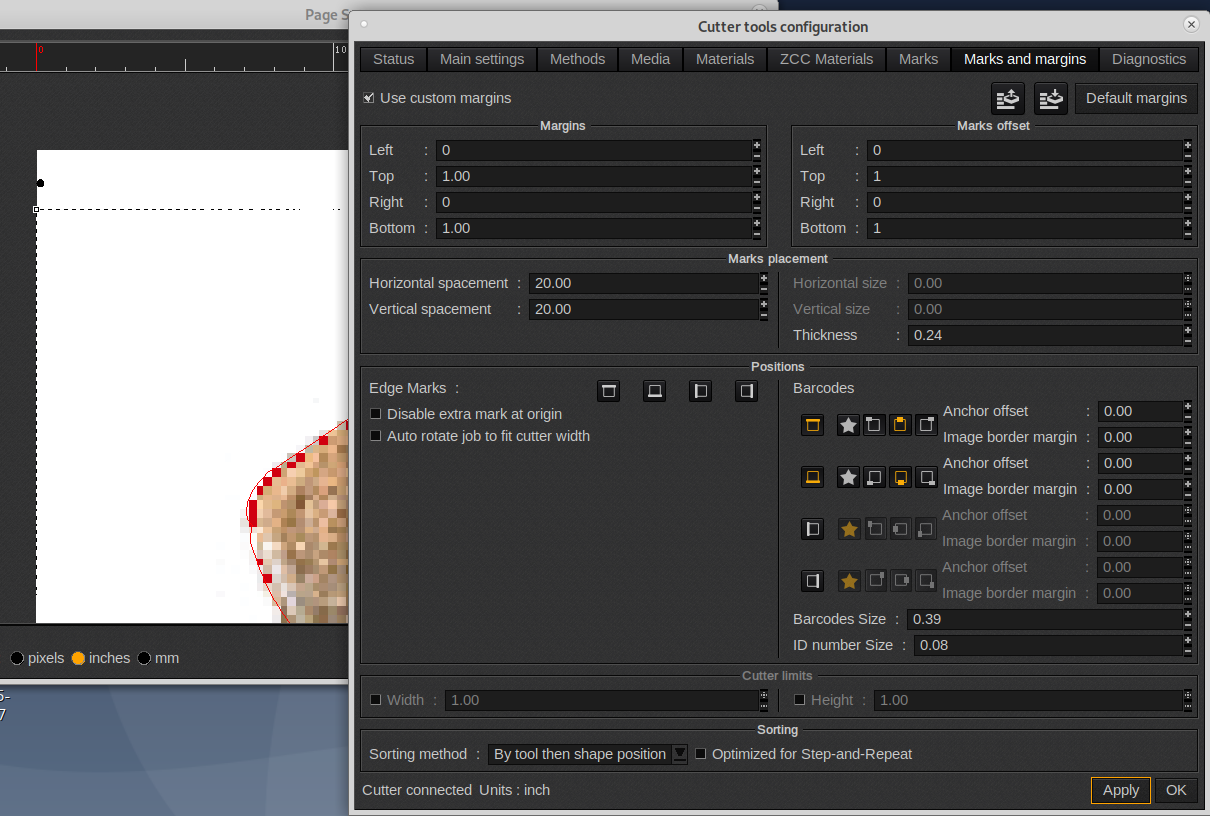
Page Setup > Cutting Tab > Tools > Marks and Margins Tab
Save or load an cut settings xml file. The custom settings under this tab can be saved and recalled using the save/load icons. Using the "Default margins" option the module can be reset to the factory default.
Also, keep in mind that custom "Marks and margin" settings can be part of a QuickPrint,

________________________________________________
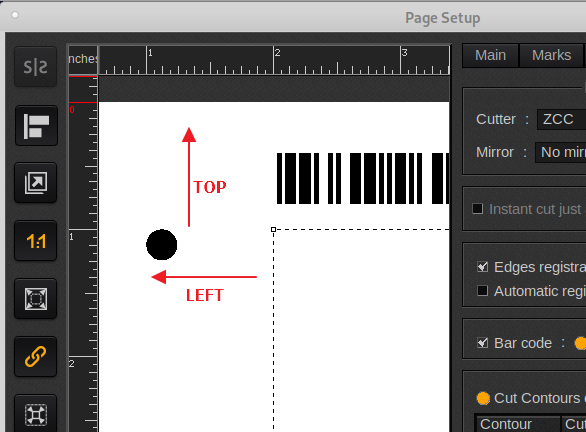
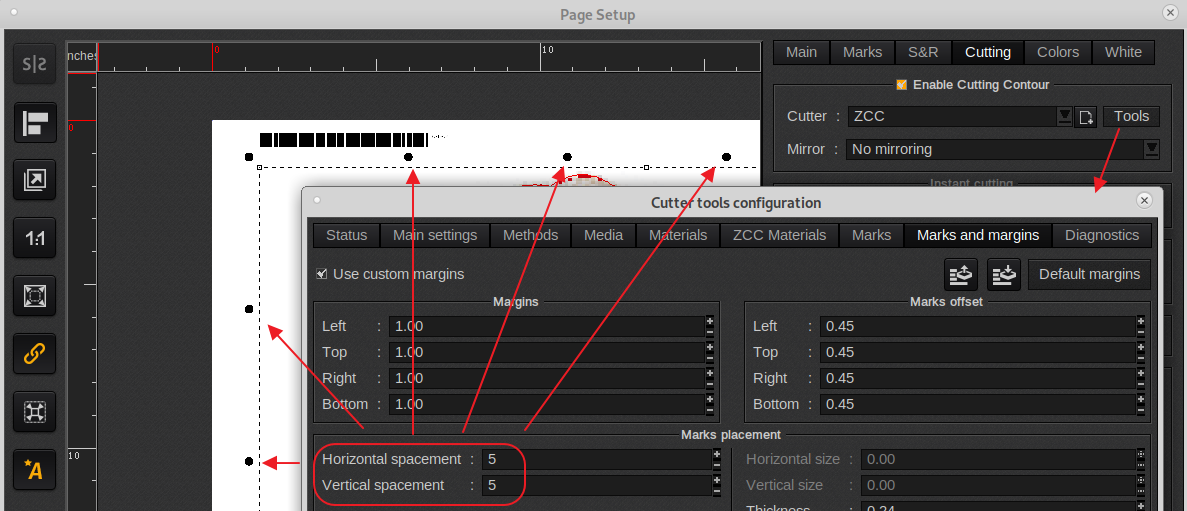
Page Setup > Cutting Tab > Tools > Marks and Margins Tab, Margins:
Registration mark, Margin
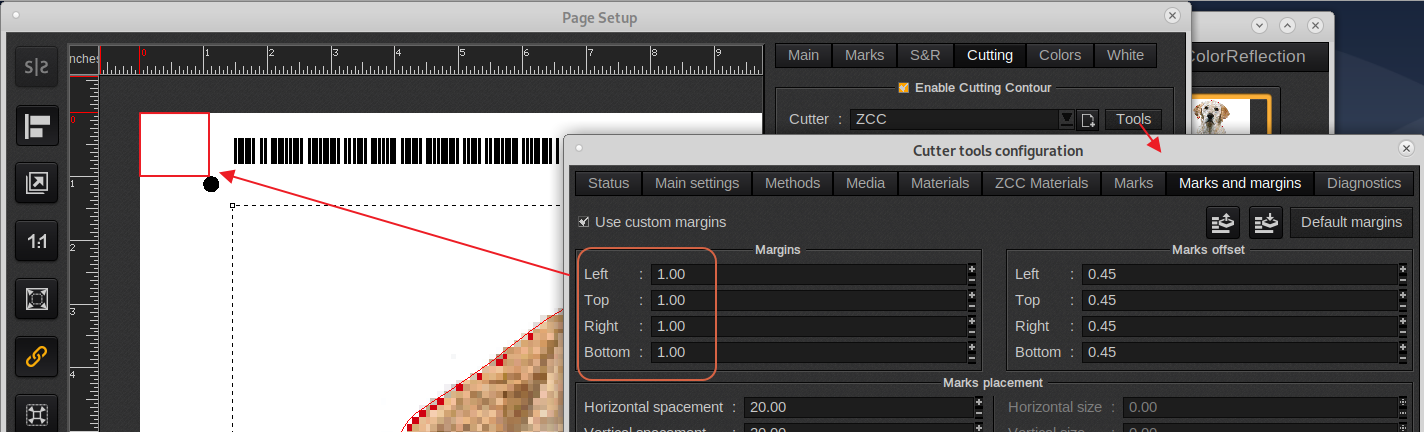
Registration mark, Margin (zoomed in)
________________________________________________
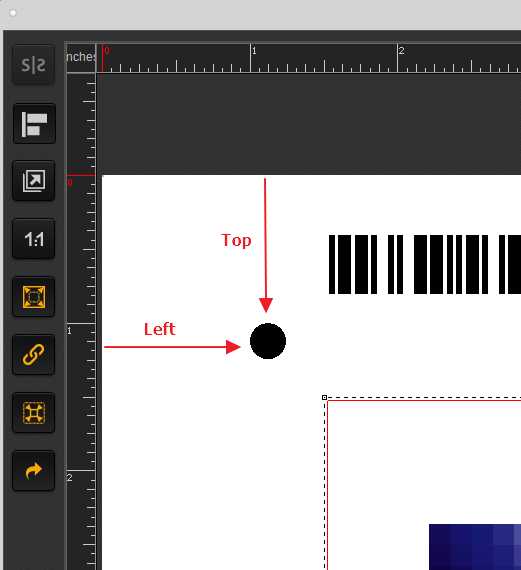
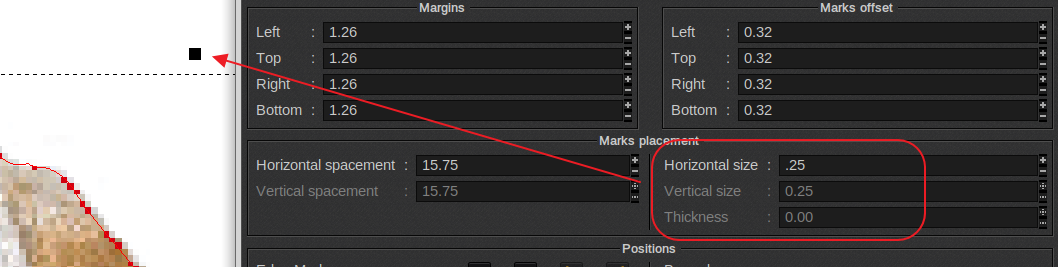
Page Setup > Cutting Tab > Tools > Marks and Margins Tab, Marks offset:
Mark offset, distance from image area to mark.
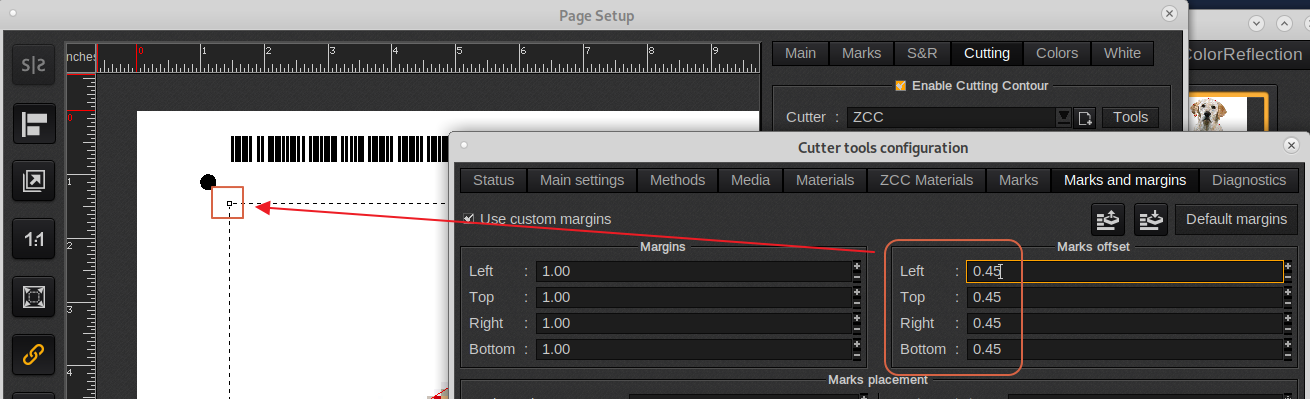
Mark offset (zoomed in, top left), distance from image area to mark.
Common setting, when for example printing (10) 18" x 24" yard signs on a 48" x 96" sheet is to disable the edge marks and move the corner marks to the top 3" and bottom 3" area of the sheet.
________________________________________________
Page Setup > Cutting Tab > Tools > Marks and Margins Tab, Marks placement.
Edge mark spacing, Horizontal/Vertical spacement
________________________________________________
Registration mark size:
Page Setup > Cutting Tab > Tools > Marks and Margins Tab, Marks placement.
Horizontal/Vertical size applies to cut drivers which support square or rectangular registration marks.
Thickness applies to the diameter size of round registration marks (Make sure your cutter is calibrated for the in Caldera defined size as this will ensure cut accuracy).
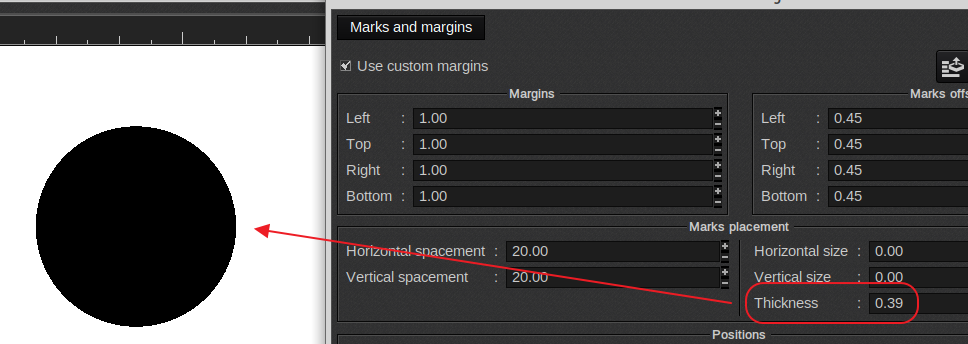
Thickness (includes edge and corner marks).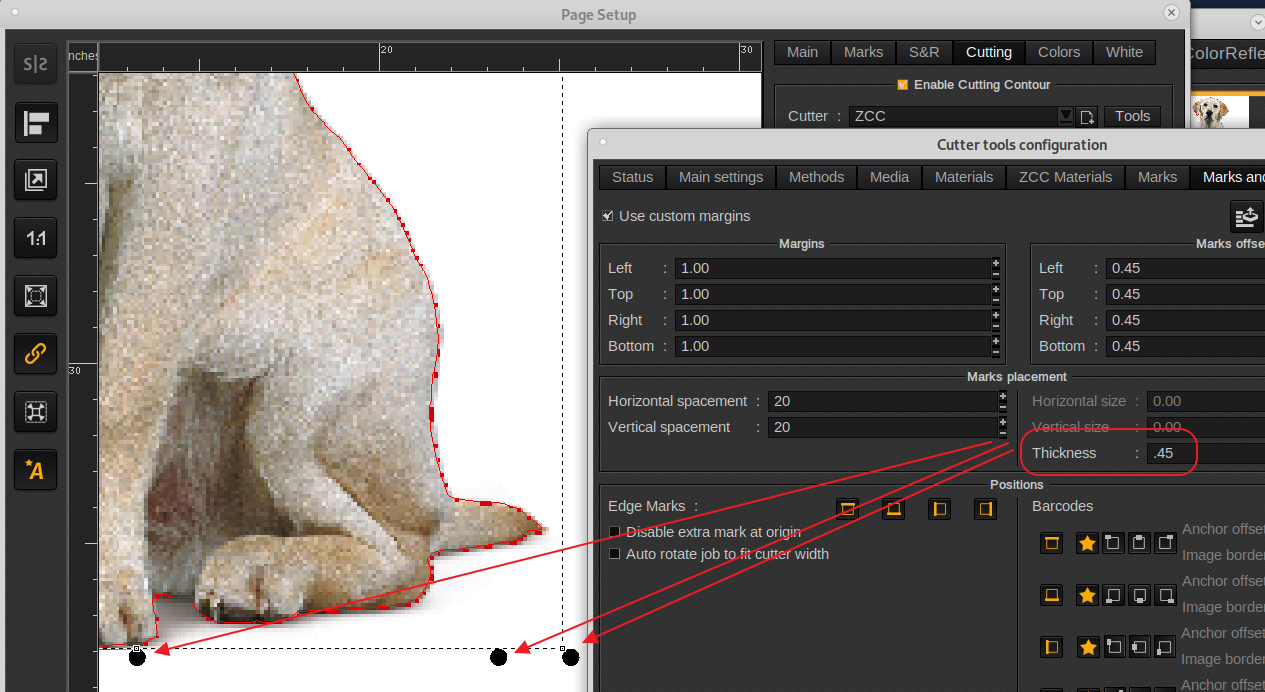
________________________________________________
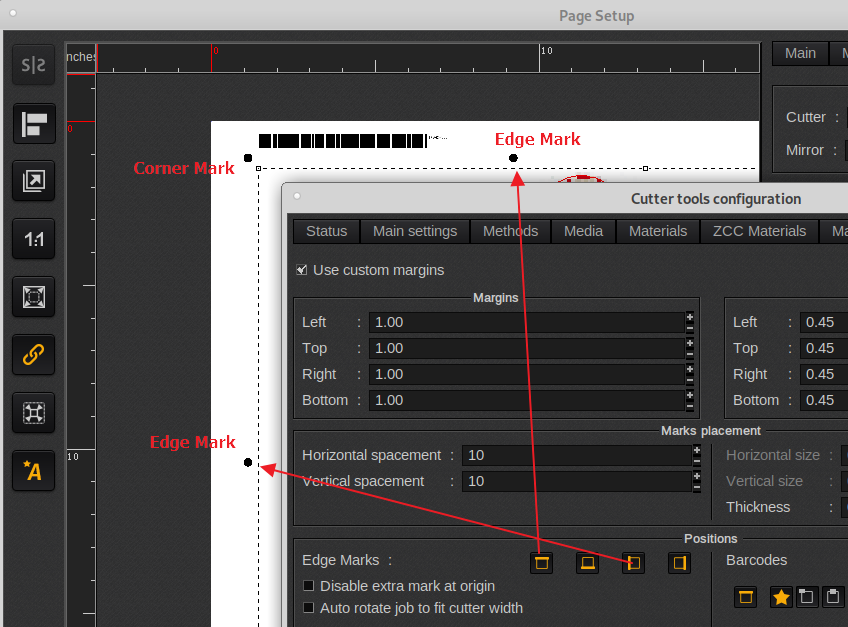
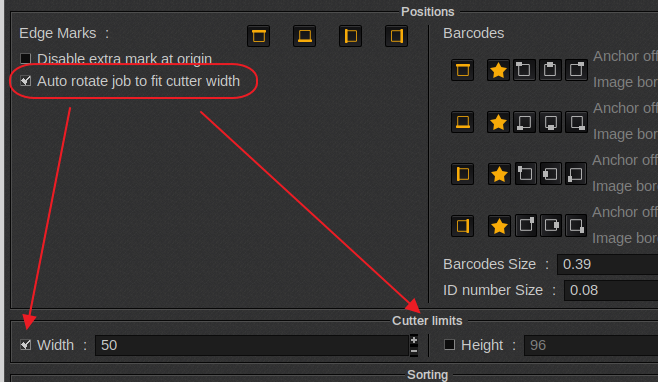
Page Setup > Cutting Tab > Tools > Marks and Margins Tab, Positions
Difference between Corner Mark and Edge Marks. Edge Marks can be disabled.
________________________________________________
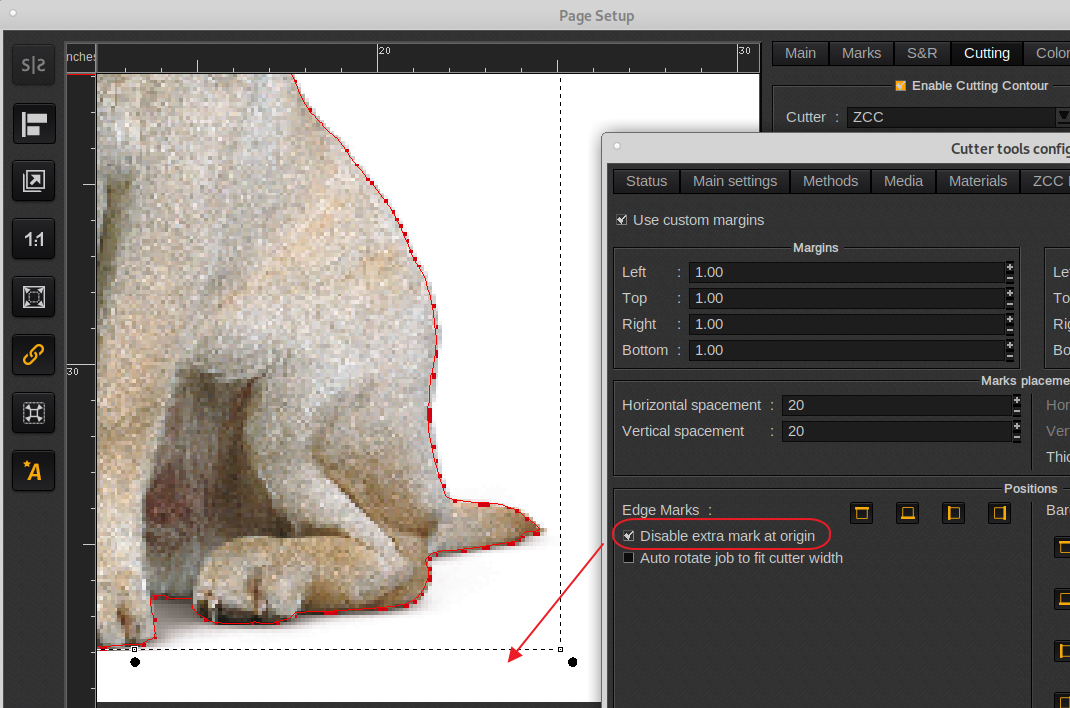
Page Setup > Cutting Tab > Tools > Marks and Margins Tab, Positions:
Origin/Orientation mark disabled, Disable extra mark at origin
Page Setup > Cutting Tab > Tools > Marks and Margins Tab, Positions:
Origin/Orientation mark enabled, Disable extra mark at origin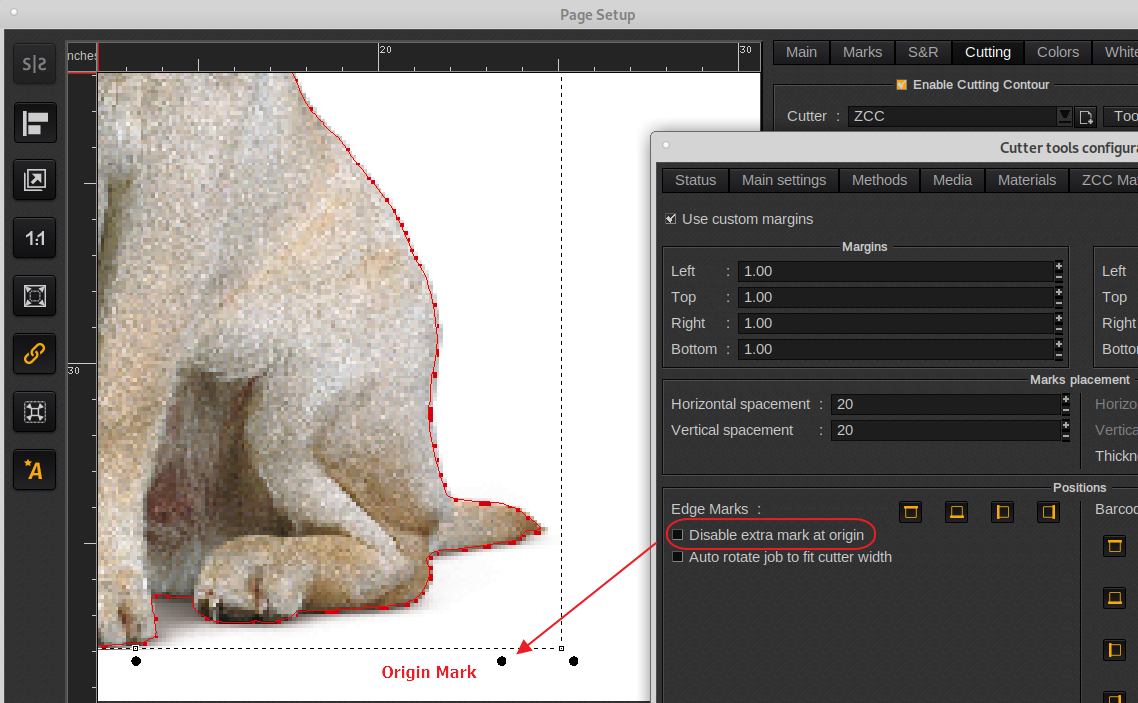
________________________________________________
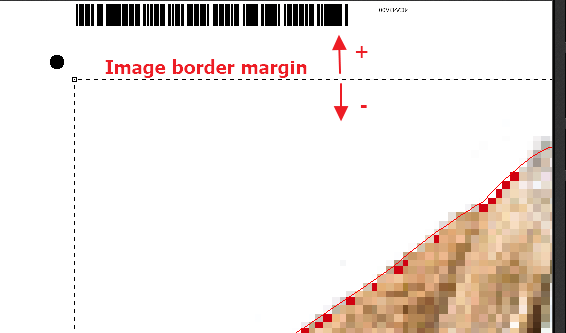
Page Setup > Cutting Tab > Tools > Marks and Margins Tab, Positions:
Barcode positioning:
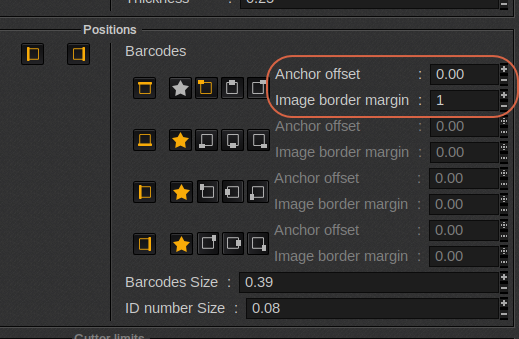
Anchor offset (can have a positive of negative value)
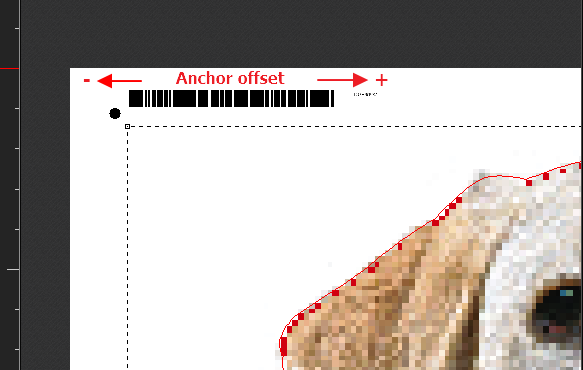
Image border margin (can have a positive of negative margin).
________________________________________________
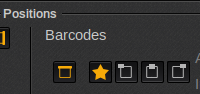
Barcode alignment/position:
On/off, default position (star), left, middle and right.

________________________________________________
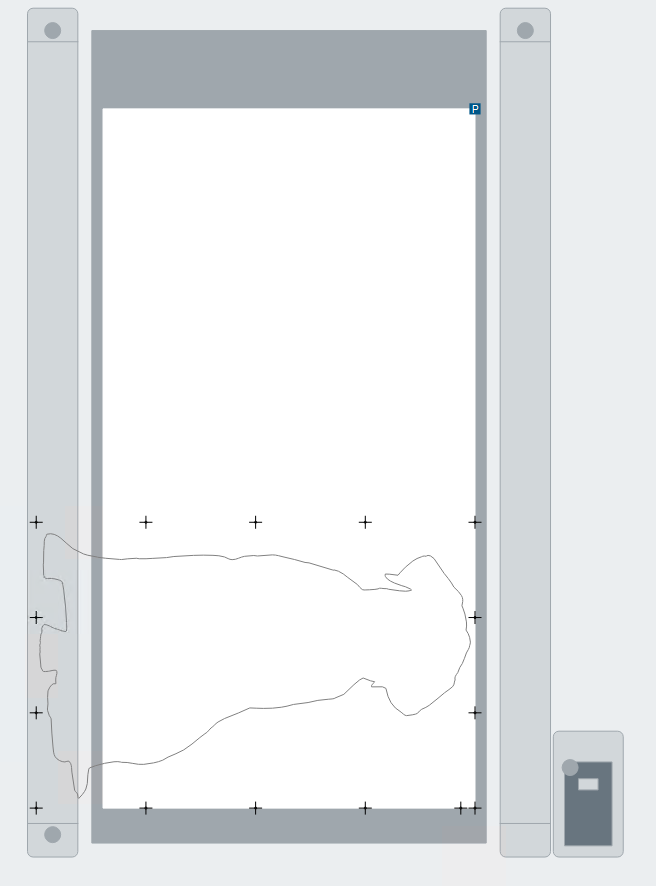
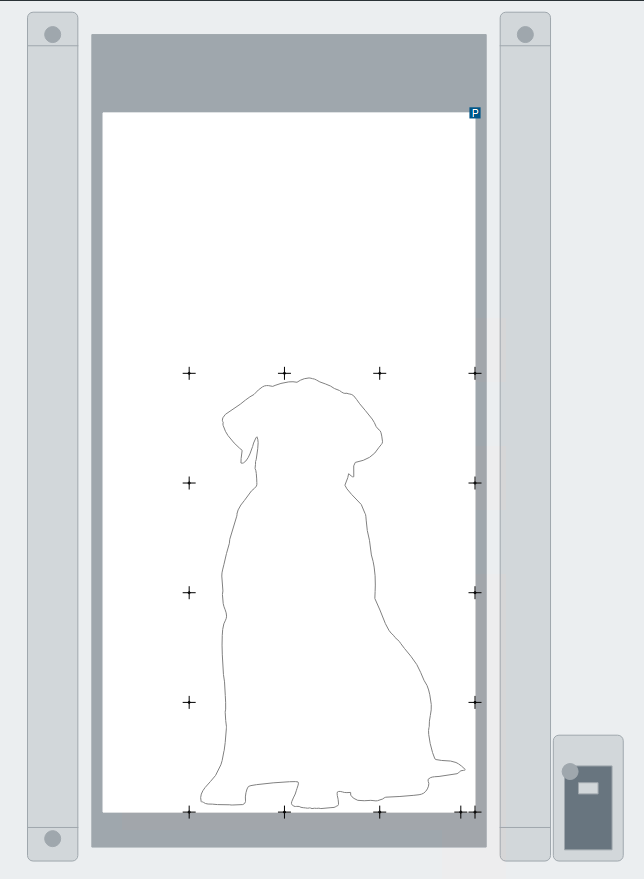
Page Setup > Cutting Tab > Tools > Marks and Margins Tab, Positions:
Auto rotate job to fit cutter width, linked to Cutter limits (bed size of the cutter)
Option, disabled (requiring the cutter operator to rotate in the cutter software)
Option, enabled and job now auto rotates to defined size of the cutter bed.
________________________________________________
Page Setup > Cutting Tab > Tools > Marks and Margins Tab, Sorting:
The sorting method, allows manipulation of the cut order.

No sorting : just the order, the contours were added to the document (matches order of drawing if it's a single PDF, order of nesting if it's a Nest or S&R),
By image : in Step-and-Repeat, cuts all contours of an image, then goes to next image.
By tool, then shape position: Cuts all the shapes assigned to the same tool, then continues with next tool (In order as in the methods list, assuming this is a supported feature). For each tool, it optimizes movements between shapes.
By shape position : only optimizes shapes order, not tool order
Optimized for Step and Repeat: Optimizes cutting when Step and Repeat has been used (see sorting methods).