After loading the EFI Fabrivu driver in Caldera it still requires some configuration (This FAQ also applies to the dual CMYK Reggiani models):
1) Add the printer specific resolutions and passes:
The list of printing modes (resolutions) for the EFI FabriVu driver must be imported from a collection of printer setup files.
On the printer controller, locate the folder "print_parameters" ([Drive]:\Reggiani\print_parameters), create a ZIP archive of the contents of this folder.
Copy it to the Caldera rip.
Settings Tab > Servers Admin > select the printer > Configure button > Resolutions tab > click the "import print_parameters.zip" button.
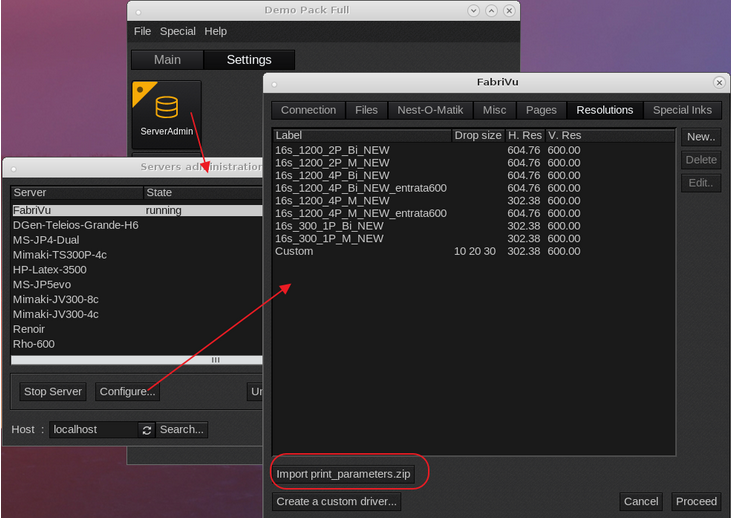
If any errors are encountered during the print_parameter.zip file check the following article on creating a complete print_parameters.zip
How to create the print_parameters.zip file
A file browser will open, allowing you to select the zipped archive > The press Proceed (password caldera) and the resolutions should appear in the printer driver.
Another option is to access the print_parameter through the network. Reggiani printers share the Reggiani folder and this folder has two subfolders:
a) jobs_to_prepare (output folder for the print/ripped files. This folder needs to be mounted as the printer driver will use this to rip the files to.
Settings Tab > Server Admin > Select the FabriVu/Reggiani > Configure > Files Tab > Base directory field.
b) print_parameters and this folder contains the printer parameter (resolutions), print_parameters_list.txt and the configuration.ini. This is the same folder which contents is to be compressed into the print_parameters.zip file.
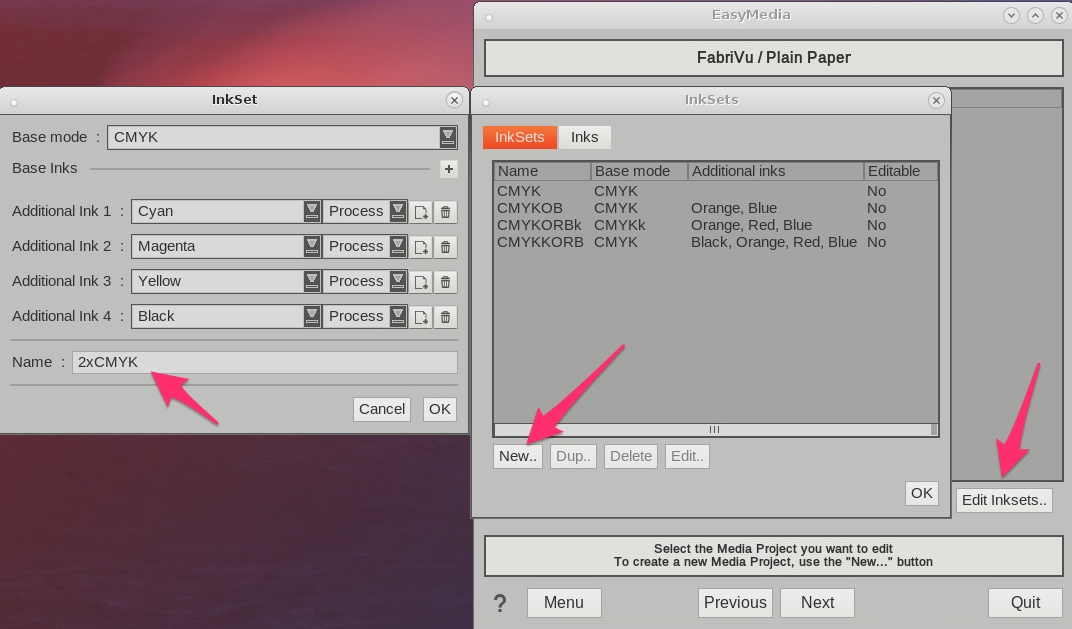
2) In case of a dual CMYK ink set, you can use a duplication for both channels : x% for C1 and C2, y% for M1 and M2, z% for Y1 and Y2 and t% for K1 and K2.
Name it 2xCMYK :
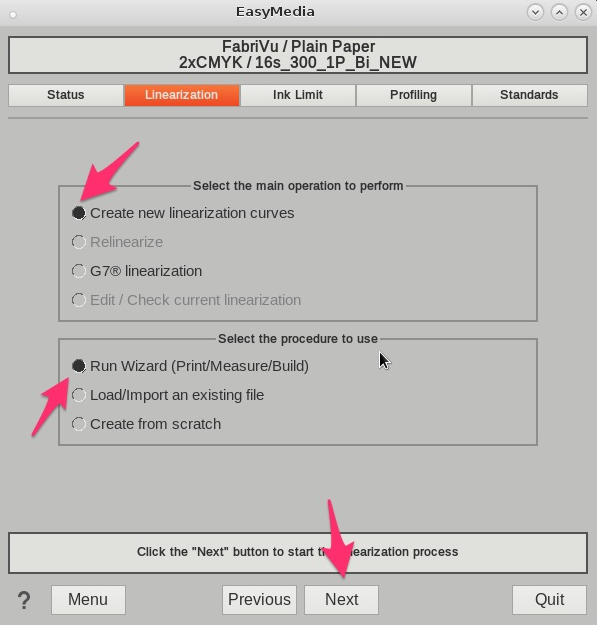
3) Now select in EasyMedia 2xCMYK as print mode and the desired resolution.
4) The last step is to set the correct ink order. Assuming KCMYYMCK as actual printer ink order it will also look like KCMYYMCK in Caldera.
So in the linearization section select, "Create new linearization curves" and "Run Wizard
(Print/Measure/Build)" <Next>
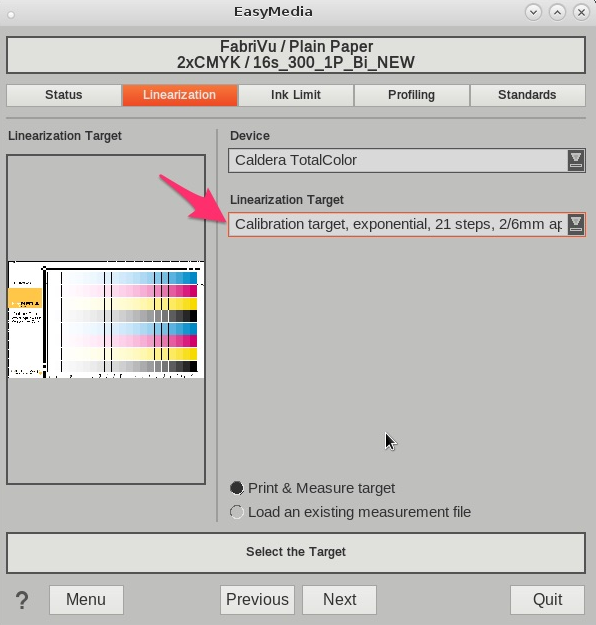
Select the Spectrophotometer and the appropriate linearization target. In this example we select the Caldera Exponential target for TotalColor, in order to get more accurate gradients in low and middle tones <Next>
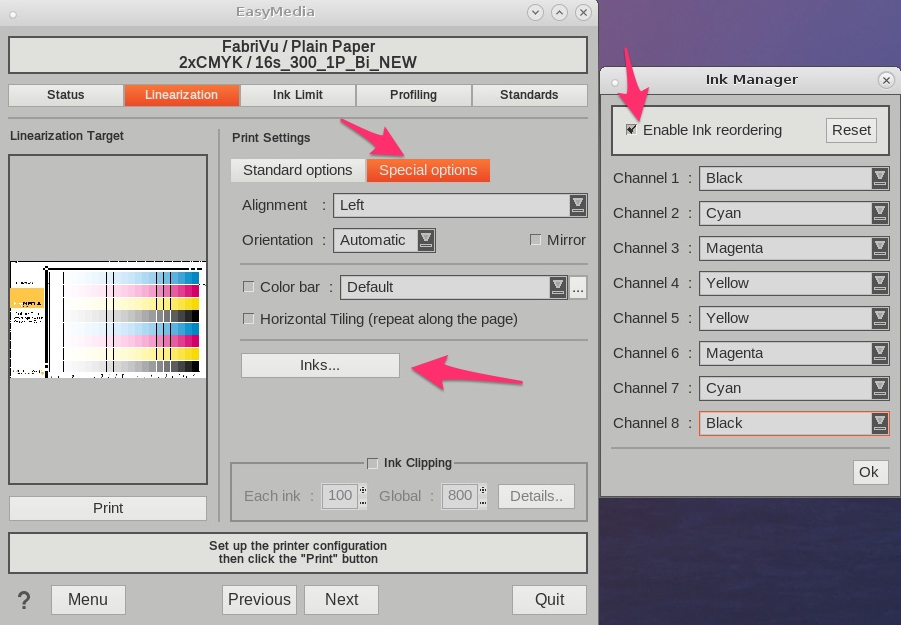
In the target print dialog we need to set the custom ink order under the Special options tab.
Assuming KCMYYMCK ink order :
Channel 1: Black
Channel 2: Cyan
Channel 3: Magenta
Channel 4: Yellow
Channel 5: Yellow (actual ink is Yellow 2)
Channel 6: Magenta (actual ink is Magenta 2)
Channel 7: Cyan (actual ink is Cyan 2)
Channel 8: Black (actual ink is Black 2)
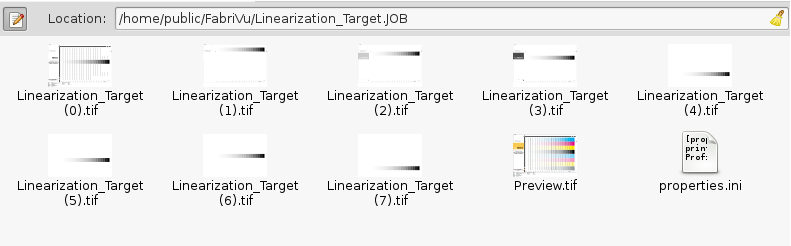
Now continue to print the target. The resulting ripped files consists out of eight 1 bit TIFF files which can be loaded on the printer controller:
After printing and measuring the target continue the normal ICC profiling process per wizard.