EasyMedia is the CalderaRIP module that guarantees smooth and accurate color reproduction on multiple media and printers.
It is a wizard-based interface, that will guide you until the end of the configuration. Keep reading to learn more:
Settings
Open the EasyMedia Settings window by clicking the wrench icon on the main view
There you can manage the following settings:
- Export folder: If "Export all ICC profiles automatically" is checked, all the newly created profiles will be automatically exported in this folder.
- Export all ICC profiles automatically: If this option is activated, all profiles will automatically be exported in the specified folder. Otherwise, it is still possible to export manually the needed profiles.
- Do not share ICC profiles between RIP and printers: This option prevents sending ICC profiles to the printer. You should activate this option when you have communication problems.
- Allow RGB profiling for all printers: Check this option to enable RGB profiling for all your printers. We recommend you also activate "Export all ICC profiles automatically" to easily find the profiles after you create them to then use for prepress.
This feature is only available to CalderaCare subscribers and users on annual subscription plans. Partners and resellers can find more details in the Partners Portal; end users can find additional information on our website.
- DeltaE formula: select the method you want to calculate the perceived difference in color. You have the choice between Cie de76 and Cie dE00. For more information on this topic, please read this article.
Before Starting
Before starting to manage your print configurations, there are some color basics to understand. Please, read carefully the following articles if you are not aware of words like rendering intents, gamuts, color spaces, etc.
- Why EasyMedia?
- What is a Color Space?
- What is a Gamut?
- What are a profile and a rendering intent?
- Prepare for Color Management:
Set up a new project
Printer
Select the printer you want to set up, and click next (or double-click on it):
You can choose another RIP station with the Host selector if you know its IP/name in your network. It will connect to the RIP and use the remote drivers to print the targets to be measured.
Media
Create or select an existing media that you want to configure:
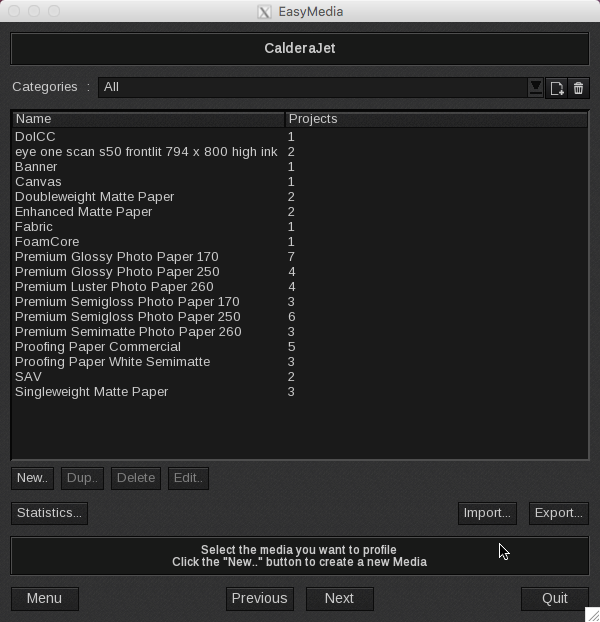
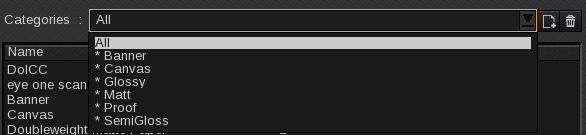
Categories
Here you can display the media according to their tags. By default, "All" are displayed:
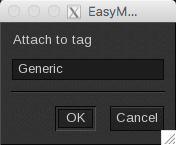
To create a new tag, select the media in the list then click  and enter the tag name. To add an existing tag to a media, follow the same process. Select the media, click the add tag button and enter the same tag name:
To delete a tag, select it in the list to display the media with this tag then click  and confirm the deletion. Tags with “*” and the "All" tag cannot be deleted.
New Creation
In EasyMedia, a media is identified by a unique media name. You can attach different pieces of information:
- Cost per square meter used in CostEstimation option.
- Printer parameters when available (depending on the model).
- Comments (restricted to 170 characters that will be also available in the printer settings and in a Spooler tab).
Import/Export
Import and Export buttons on the bottom right give access to a specific interface for installing a print configuration called a Caldera patch (.calpatch) or saving it. You can get a prepared patch directly from the Caldera Profile Library (No more supported since V12, replaced by CalderaDock download interface), manually, or from the printer itself when it allows it (Auto-Sync button).
Statistics
The Statistics button opens the printer's statistic window. It displays data about the printer's profiles:
Click the header of the column you want to sort by. Sorts by ascending or descending order.
- Media: name of the media.
- Mode: color mode used.
- Resolution: resolution chosen.
- Quality: the quality that has been chosen. The naming of the qualities is linked to the printer driver.
- Status: status of the ICC profile project. It can either be: Empty (the project has been created but not started), In progress (the profiling step has not been completed yet) or Completed.
- Date: date of the profiling.
- Printer Parameters: Print heater, Dryer, Vacuum power, Head height... these parameters are printer related.
- TR-Ratio: (only for profiles with light inks) ratio of the transition tab between the light and dark inks.
- TR-LightMax: (only for profiles with light inks) light ink maximum value.
- TR-DarkStart: (only for profiles with light inks) dark ink starting value.
- LIN-InkLimit: ink limit value.
- LIN-C: maximum Cyan density percentage.
- LIN-M: maximum Magenta density percentage.
- LIN-Y: maximum Yellow density percentage.
- LIN-K: maximum Black density percentage.
- LIN5, LIN6...: (only for profiles with NColor) other colors maximum percentage.
- ICC Target: name of the target used to build the ICC profile.
- Nb patches: number of patches included in the target.
- Device: spectrophotometer used to measure the target.
- Mode: mode of the measurement used, is either Spectral or Lab.
- Engine: engine used to perform the profiling action.
- Separation Method: black separation method.
- Black Start: black ink starting value.
- Black Max: maximum black ink value.
- Max Ink: ink limit for black (including ink mixing)
- White pt: white point value.
- Black pt: black point value.
- Gamut/Swop: the difference between the profile gamut and the Swop profile.
- Gamut/sRGB: the difference between the profile gamut and the sRGB profile.
- Export...: opens the following window to export these statistics into a CSV file. Select the separator you want to use in the file: Semi-Colon (;), Comma (,) or Tab.
Ink, resolution, and quality
Create or update a project with a given configuration: ink mode, resolution, and optionally a quality (depending on the printer).
Project
Congrats, you have created a new project!
Four "Status" you may see:
- Empty : this is the first status when you start a project and no calibration step has been performed yet.
- Calibration complete: the project is completed and saved.
- Calibration in progress: the project has started but is not completed yet and its progression has been saved.
- Calibration in progress (Modified): the project has started but is not completed yet and its progression has not been saved.
Warning
Do not forget to Save the Project before leaving the Project Manager, especially at the end of the Calibration process. It does not save automatically.
Calibration
Calibration is the process to stabilize a print configuration. We go from a wild printer state to a known state where 50% of ink is really 50% of ink and there are no artifacts appearing due to the media (non)-absorption when mixing 100% of all inks.
It is composed of 3 main steps:
- Transitions: Process to use one virtualized ink composed of light and dark ink. It is not available for ink modes without light inks.
- Linearization: make ink deposit linear (correct for the mechanical variation) and limit each ink channel to 100% ink that does not bleed and dry correctly.
- Ink Limit: total ink limitation when mixing combinations of inks to avoid artifacts.
Each step is decomposed of the same substeps:
- Print a target
- Measure the target with a spectrophotometer (Not for ink limit that is a visual check)
- Tune the correction
- Check visually with a verification print
- Save the step
Characterization
Characterization is the process to build a predictive model (stored in an ICC profile file) where when asking for color in an independent colorspace, you will have the exact composition of ink that will guarantee both accuracy and smoothness of your image.
Caldera relies on the X-Rite i1Prism engine for the computation of ICC profiles.
Verification
Verification is the process to check that your characterization built on your calibration is acceptable: it verifies a set of given rules with tolerances.
- Relinearisation: A way to resync your linearisation with small mechanical variations of your printer
- Print Standard Verifier: A module dedicated to conforming and checking conformance to color standards.